We’re glad that you already got your own Huawei P40 Pro or other variants from the brand’s latest series. As great as the device can be, it’s not a secret that the majority of Android phones today highly rely on Google Mobile Services (GMS).

The old steps on how to install Google Play Store on a Huawei device no longer work on the P40 series, so after a few research, here’s one of the most effective ways that we tried on how you can install GMS on your P40 smartphone with Google Pay working well.
Before you jump in, just a quick disclaimer that these steps and files are not completely ours. It worked for our P40 Pro device but we cannot guarantee that it will flawlessly function on yours. So be sure that you’re truly ready to take this risk as we won’t be responsible for any malfunction.
Moreover, please be careful in following the steps thoroughly. Make sure to spare at least 15 to 20 minutes in doing the procedure, especially if it’s your first time.
Let’s start.
1. Make sure that you have a good internet connection, a laptop or PC, and a USB OTG (Type-C) or a USB plus a Type-C adapter that works with your Huawei smartphone and PC to transfer the files needed.
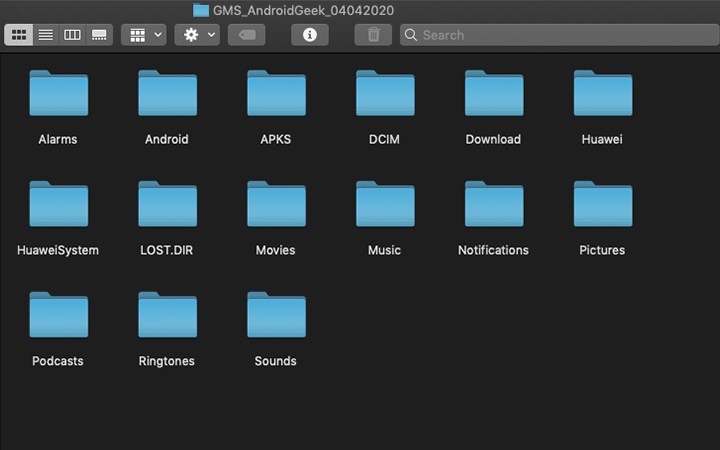
2. Download all the files from AndroidGeek’s link then extract or unzip the file.

3. Copy all the files to your USB OTG. Take note that this method will be more effective if there are no other pre-existing Huawei folders in your USB OTG.
4. Proceed by connecting the USB OTG to your P40 device.
5. In your phone, go to Settings > System & Update > Backup & Restore > Data Backup. Tap on External Storage then go to USB storage.

6. Click on 28 March 2020 and use the password androidgeek.pt2. Moving forward, untick the System settings part then hit restore and wait for it to finish.
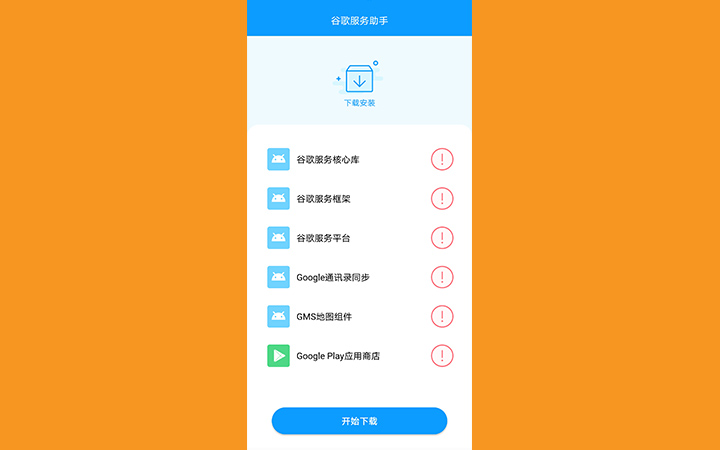
7. Once it’s done, you’ll find 2 new applications in your home screen or app drawer. Yes, one of the apps is really in Chinese characters.

8. Tap on the app with the big letter ‘G’ (with Chinese characters) then select Activate or Allow. You’ll see a request like the photo below and hit the blue button twice. As it processes the files, don’t close the app itself yet. Simply exit via the home button or swipe up if you’re using gestures.

9. On to installing the APK files, go to your phone’s Files app and open Internal storage > APKS > Google Installation where you’ll find 9 APK files arranged by their corresponding numbers.

10. Install APK files labeled (1) to (6). Be sure to only install files 1-6 for now.
11. Go to Settings and tap on Users & accounts. Then login all your Google accounts that you want to use. Do take note that you can only do this part once, so better put all your necessary accounts if you have multiple or work-related ones.
The next few steps will require more patience so please take your time.
12. Go back to the APKS folder as in step number 9 and install APK number (7) only.
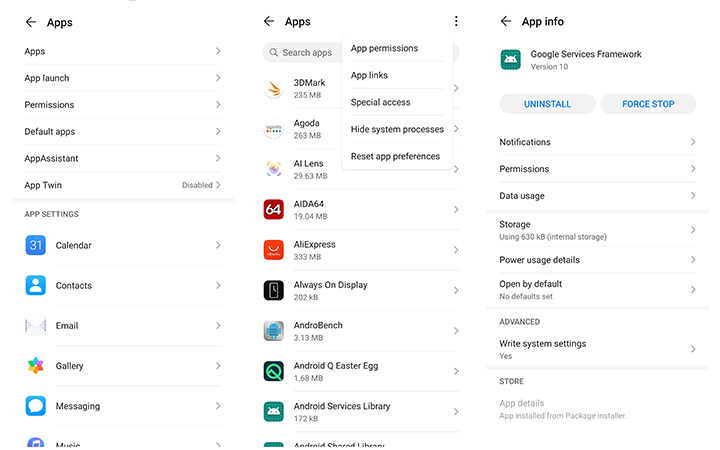
13. In the Settings, go to Apps > Apps and search for Google Play Services. Tap on it and uninstall.
14. Go back to the APKS folder (step 9) and install APK number (8).
15. Then, go to Settings > Apps > Apps and click on the 3 dots found on the upper right corner. From there go to Show System Processes and then tap on Google Service Framework.

16. In Google Service Framework, tap on Storage and hit Clear Cache and Data. Then go back and uninstall Google Service Framework. With this action, your smartphone might freeze and if this happens, restart your device by long pressing on the power button.
17. Now even if you did or did not need to restart your device, go back to the APKS folder and install APK number (7) again.
18. Open the Google Play Store app and expect a few server error feedback, which is normal. Try to open the app at least 2 to 3 times and wait for it to work. If it still shows server error, close all apps including Play Store, and open it again.
19. When it loads properly, don’t download anything yet as it’s important that you uninstall Google Play services again. So go to Settings > Apps > Apps and search/go Google Play Services. Then uninstall.
20. The last step is to go back to the APKS folder and install APK number (9). And you’re done!
At this point, if you still receive prompting notifications, then you might have missed a step. Now to fix this, go to Settings > Apps > Apps > Show System Processes and type search Google. Tap that then clear cache and data and uninstall each that starts with Google. Then repeat steps 12 to 20.

YugaTech.com is the largest and longest-running technology site in the Philippines. Originally established in October 2002, the site was transformed into a full-fledged technology platform in 2005.
How to transfer, withdraw money from PayPal to GCash
Prices of Starlink satellite in the Philippines
Install Google GBox to Huawei smartphones
Pag-IBIG MP2 online application
How to check PhilHealth contributions online
How to find your SIM card serial number
Globe, PLDT, Converge, Sky: Unli fiber internet plans compared
10 biggest games in the Google Play Store
LTO periodic medical exam for 10-year licenses
Netflix codes to unlock hidden TV shows, movies
Apple, Asus, Cherry Mobile, Huawei, LG, Nokia, Oppo, Samsung, Sony, Vivo, Xiaomi, Lenovo, Infinix Mobile, Pocophone, Honor, iPhone, OnePlus, Tecno, Realme, HTC, Gionee, Kata, IQ00, Redmi, Razer, CloudFone, Motorola, Panasonic, TCL, Wiko
Best Android smartphones between PHP 20,000 - 25,000
Smartphones under PHP 10,000 in the Philippines
Smartphones under PHP 12K Philippines
Best smartphones for kids under PHP 7,000
Smartphones under PHP 15,000 in the Philippines
Best Android smartphones between PHP 15,000 - 20,000
Smartphones under PHP 20,000 in the Philippines
Most affordable 5G phones in the Philippines under PHP 20K
5G smartphones in the Philippines under PHP 16K
Smartphone pricelist Philippines 2024
Smartphone pricelist Philippines 2023
Smartphone pricelist Philippines 2022
Smartphone pricelist Philippines 2021
Smartphone pricelist Philippines 2020
George says:
Step 1: Don’t buy Android phones without Google Services.
Dhruv says:
Hi Team,
Thanks for providing this wonderful trick. I try this on 12-June but not able to acrivate Lzplay as suggest in step-8. Look like LZPplay not working.
Could you please check and share any other alternative.
– Dhruv Gheewala
vb says:
lzPlay isnt working