Does your desktop PC lack connectivity features such as WiFi and Bluetooth?
In this guide, we’ll walk you through some simple steps to add essential features to your PC —- including Wi-Fi, Bluetooth, NFC, and Infrared.
Table of Contents
Before you start adding new hardware to your computer, it’s important to make sure that it is compatible with your system.
You can check your computer’s specifications, such as the motherboard and chassis, to see if they have the necessary ports to support such features—which usually utilize USB connection for them to work.
If your PC doesn’t have enough inputs and outputs (I/O), you can check this all-in-one hardware with USB, audio, and card reader ports that connects via USB 3.0 header.

5.25 Media Dashboard for PC
This fits perfectly for older system unit chassis with front panel compartments.
But if your chassis is clean at the front, no worries because you can utilize the back panel and use this seven-port card expansion (with USB 3.0 and Type-C ports) that connects via PCIe.

7 Port PCIe to USB Type-C and USB 3.0
Once you’ve determined compatibility, it’s time to choose the hardware you need.
There are lots of standalone adapters out there for each specific feature, but you can also find an all-in-one solution that includes two or more of these features in only one hardware.
Take a look at this TP-Link Archer TX3000E for example: it already combines Bluetooth 5.0 and Wi-Fi 6 in one item.
However, to install it, you do need to open your system unit and install the chip via PCIe.
If you do want the Wi-Fi antennas built-in with the chip at the back panel, you may check this another item from TP-Link. The Archer TX50E with Wi-Fi 6 and Bluetooth 5.0 as well.
Look at where the antennas are, directly connected at the back panel, thus less clutter.
Now that you have the hardware ready, it’s time to install it on your computer.
Like I mentioned earlier, this may involve opening up your computer’s chassis and installing a new card, or simply plugging in a USB adapter.
Follow the manufacturer’s instructions to install the hardware properly, especially in instances where it needs connection with header pins.
Purchasing a USB-enabled hardware will definitely save you from all the hassle.
After the hardware is installed, you’ll need to, of course, install the drivers.
The manufacturer should provide a CD or a download link with the necessary drivers.
But modern computers today don’t even have a reader for an outdated floppy disk nor a CD-Drive.
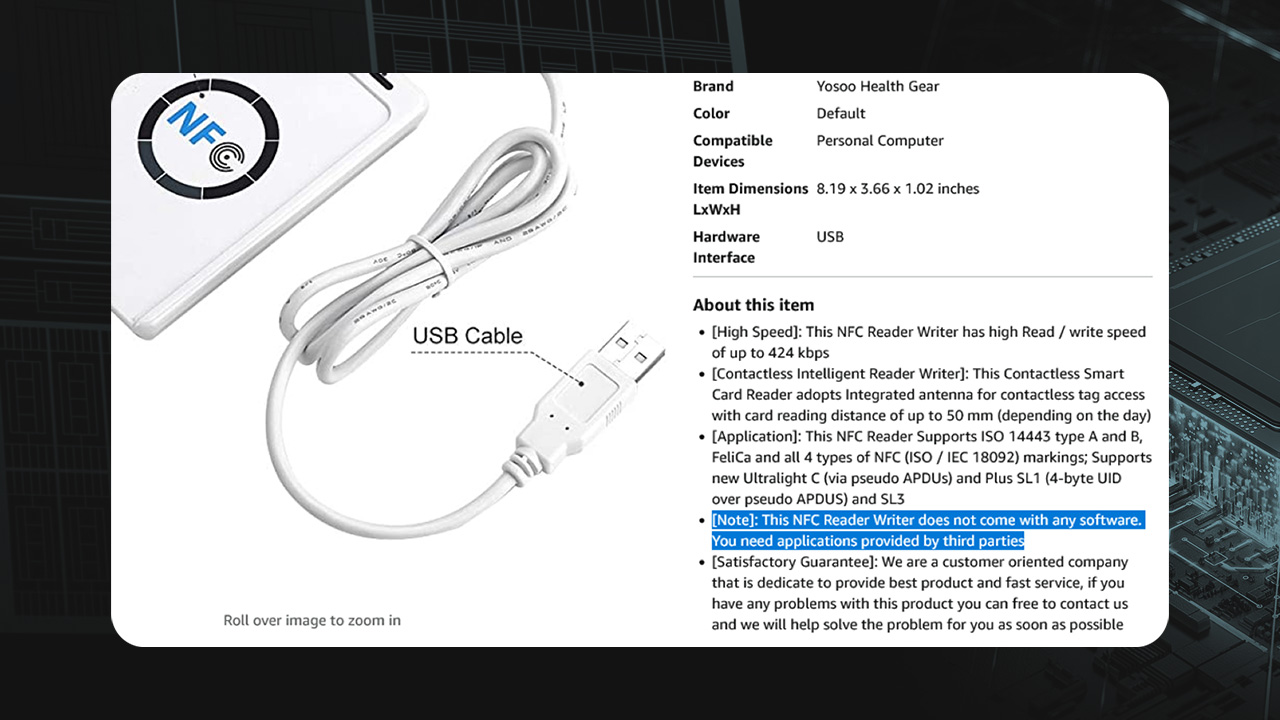
Take a look at this NFC Writer and Reader from Amazon.

The description specifically says that it doesn’t come with any software and needs third party applications to work.

Despite the promo image having an outdated PC disk.
So, in cases like this, you may really have to rely on third-party apps for the NFC hardware to work like this NFC Tools for Desktop by wakdev.
Some of them do have the Plug-and-Play capability—which is neat.
A hardware that has Plug-and-Play automatically installs the drivers as you plug it into your PC.
USB-enabled hardware usually has this capability, but some may need additional software.
Let’s take a look at this FLIRC Infrared receiver for PC which has a USB dongle form factor.

To use this specific item, they have a website where you can download an app which can do the programming stuff for ANY of your old TV remote lying around in your living area.

Installation of the necessary drivers and software should be a piece of cake, but just make sure to click the right buttons and of course, the correct URLs.
Once the hardware and drivers are successfully installed, as usual, test each feature to make sure they’re working properly.
Turn on WiFi and try to connect to a network, pair your computer with a Bluetooth speaker, test NFC connectivity with a compatible device, and use the Infrared to remotely control your PC.
Adding these features to your PC can greatly enhance its functionality and connectivity, so you can enjoy a more versatile computing experience.

YugaTech.com is the largest and longest-running technology site in the Philippines. Originally established in October 2002, the site was transformed into a full-fledged technology platform in 2005.
How to transfer, withdraw money from PayPal to GCash
Prices of Starlink satellite in the Philippines
Install Google GBox to Huawei smartphones
Pag-IBIG MP2 online application
How to check PhilHealth contributions online
How to find your SIM card serial number
Globe, PLDT, Converge, Sky: Unli fiber internet plans compared
10 biggest games in the Google Play Store
LTO periodic medical exam for 10-year licenses
Netflix codes to unlock hidden TV shows, movies
Apple, Asus, Cherry Mobile, Huawei, LG, Nokia, Oppo, Samsung, Sony, Vivo, Xiaomi, Lenovo, Infinix Mobile, Pocophone, Honor, iPhone, OnePlus, Tecno, Realme, HTC, Gionee, Kata, IQ00, Redmi, Razer, CloudFone, Motorola, Panasonic, TCL, Wiko
Best Android smartphones between PHP 20,000 - 25,000
Smartphones under PHP 10,000 in the Philippines
Smartphones under PHP 12K Philippines
Best smartphones for kids under PHP 7,000
Smartphones under PHP 15,000 in the Philippines
Best Android smartphones between PHP 15,000 - 20,000
Smartphones under PHP 20,000 in the Philippines
Most affordable 5G phones in the Philippines under PHP 20K
5G smartphones in the Philippines under PHP 16K
Smartphone pricelist Philippines 2024
Smartphone pricelist Philippines 2023
Smartphone pricelist Philippines 2022
Smartphone pricelist Philippines 2021
Smartphone pricelist Philippines 2020