Disclaimer: I am comparing the XP Pen Artist Pro 24 (Gen 2) with our recent review of the XP Pen Artist 22 Plus since that is the unit we have personally tried and tested. Although they also have the XP Pen Artist Pro 24 (1st Gen), I didn’t personally review it, so it would be biased if I compared it based only on reference images. However, I will still try to make some visual comparisons in certain sections. For clarity, most of the comparisons will be based on the XP Pen Artist 22 Plus.
Last year, I reviewed the XP Pen Artist 22 Plus, and I was blown away by what it offered to creative artists like me, especially for its price. XP Pen sent over their newly launched Artist Pro 24 (Gen 2) Drawing Display, and after using it for a few weeks, I’m already excited to share what this device can offer. Again, keep in mind that there is an Artist Pro device, but since I haven’t reviewed that one, most of the comparisons will be with the device we personally tested for a better reference of the experience at the time of the review.
So, let’s dive in!
Table of Contents
The XP Pen Artist Pro 24 box color theme is now comes in a teal box and still has the illustration by a renowned artist , Shan Jian.
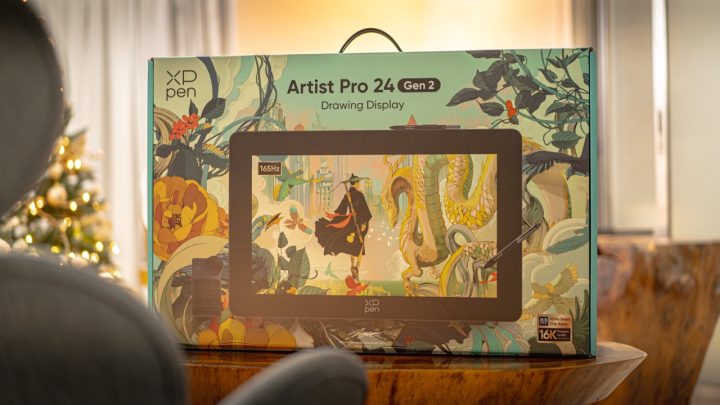
In front of the box, there is the text “Artist 22 Plus Gen 2 Drawing Display,” the logo, and an image of the display, which now includes the wireless keyboard. It also highlights the 165Hz refresh rate, the X3 Pro Smart Chip stylus, and the 16k pressure level.
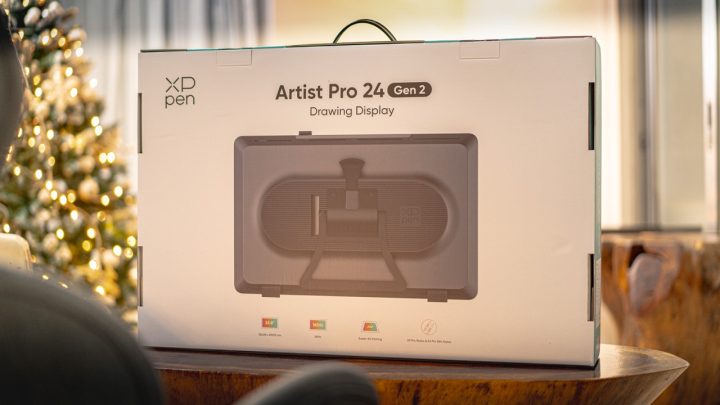
While at the back, the key features are highlighted: a 23.8″ display with dimensions of 526.08 x 295.92mm, the Super AG Etching, and the dual stylus options (X3 Pro and X3 Pro Slim), along with a preview of the back of the display.
On the side, they included the specifications, which I will provide below as well.
In comparison with last year’s XP Pen Artist 22 Plus, the packaging is still well-packed. Although we didn’t show it in the photo, when it arrived, it was in dual box packaging, meaning aside from the box you see in the photo, there was another box for added protection during shipping.
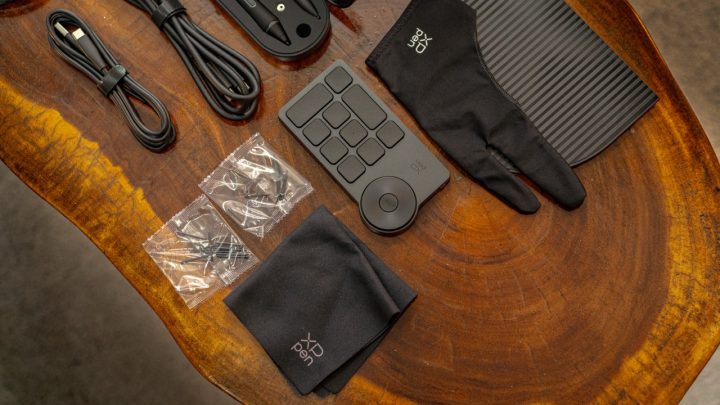
This year, they added a bunch of new accessories. You can check our unboxing video below.
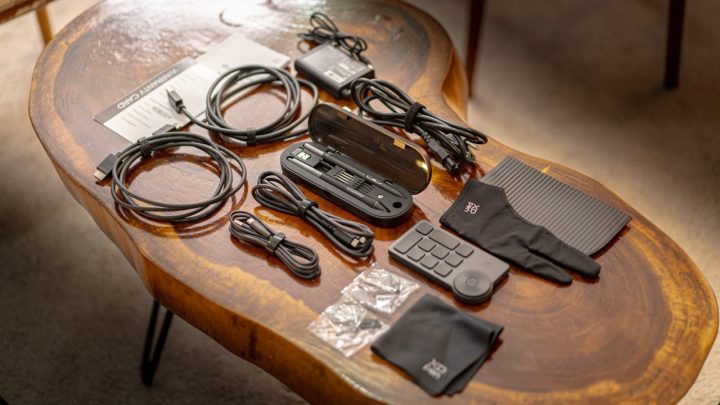
| Accessories included in the Box | |
| XP-Pen Artist Pro 24 Gen 2 Stylus Case – X3 Pro Smart Chip Stylus – X3 Pro Slim Chip Stylus – Pen Nibs (20) + Additional 20 Spare Quick Guide Warranty Card Pen Clip Cleaning Cloth | Wireless Keyboard + USB Dongle Nib Removal Tool Drawing Glove USB Type-C to USB Type-C Cable USB-Type-A to USB Type-C Cable HDMI Cable DP Cable to DP Cable Power Cable Power Adapter (60w) Back Panel Cover |
Taking a closer look at the XP Pen Artist 22 Plus, you’re greeted by a generous 23.8-inch display with a 165Hz refresh rate, featuring minimal branding except for the logo centered at the bottom bezel.
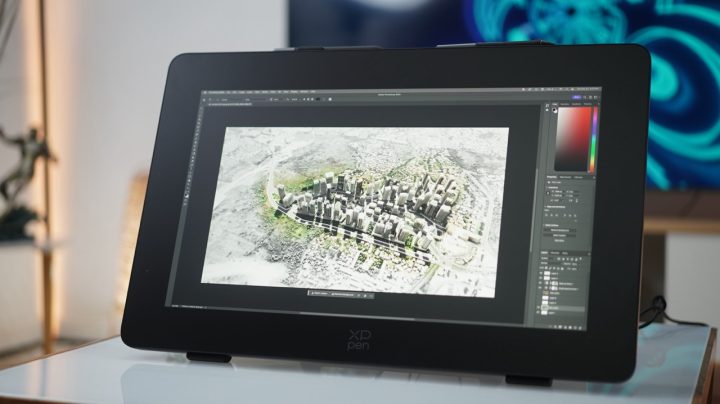
Also, this year they have two variants: one is 4K, and the one we have for review is the 165Hz + 2.5K QHD Resolution Display.
This year, they removed the screen protector since the display has some new technology. We’ll dive more into the display features later on.
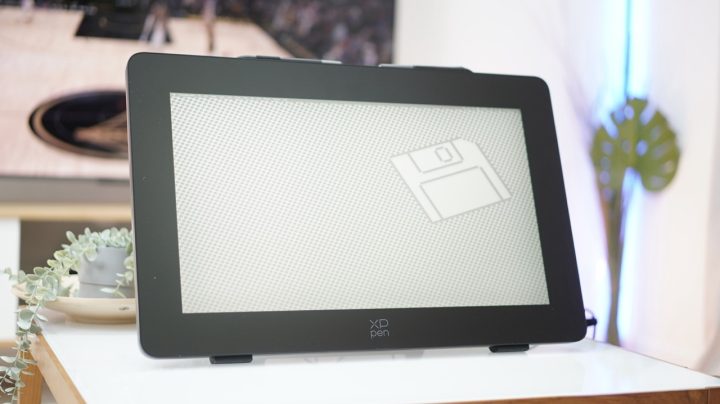
Immediately, you’ll notice that this year they made the bezels thicker but still symmetrical, and now flat compared to last year’s design, where the edges were chamfered. Although it feels a bit unusual to see a thicker bezel, especially since we’re used to thinner ones, for designers, this is a must for better palm rest. And yes, this year, they made it thicker for better palm resting.
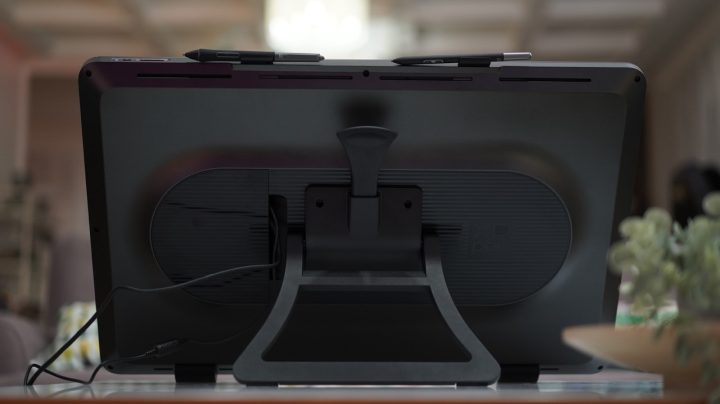
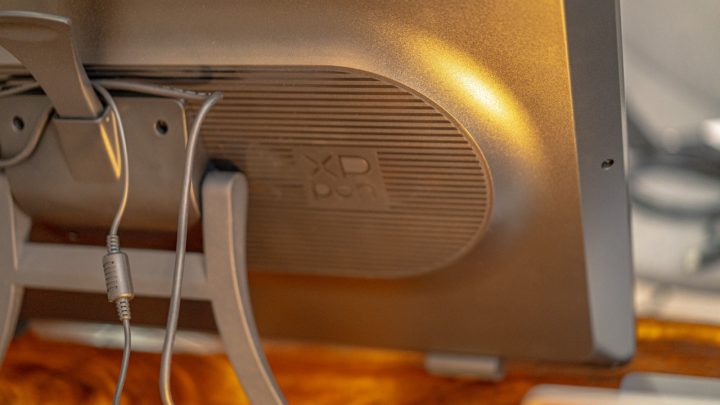
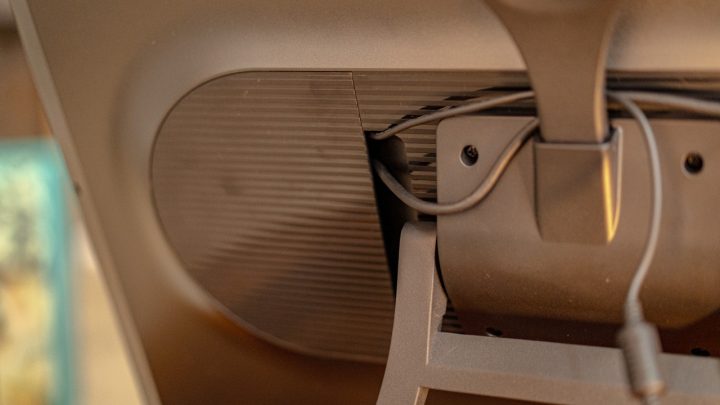
The symmetry of the display is quite notable. Both vertically and horizontally, the design maintains a clean, minimalist aesthetic. The edges are slightly rounded, softening the overall look of the device while making it easier to handle. It’s clear that the design aims for practicality without sacrificing visual appeal.
Also, at the top part, there are now two slots since they included two styluses this year—one for the X3 Pro Smart Chip Stylus and the other for the X3 Pro Slim. I also noticed that the holder for the X3 Slim is rubber-type, while the X3 Pro Smart Stylus has a similar holder as before. You won’t be able to swap the holders since the styluses won’t fit in the other slot if you accidentally mix them up.
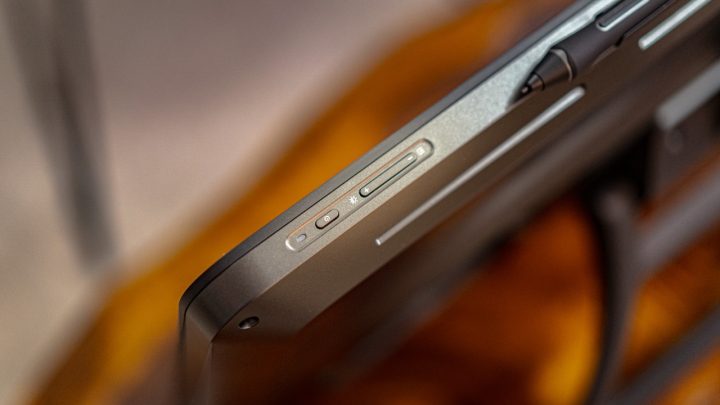
Another design change is in the buttons. Before, there were engraved icons in front to identify the buttons, but now all the icons are beside the buttons on top. The functionality includes power, display brightness (+ and -), and quick adjustments if you want to switch to HDMI, Type-C, or DP Display. The buttons are now slightly recessed for added security to prevent accidental presses, but they are still located in the same upper-right position.
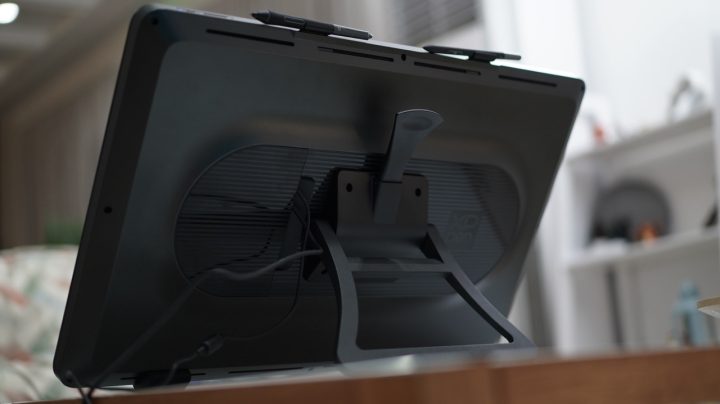
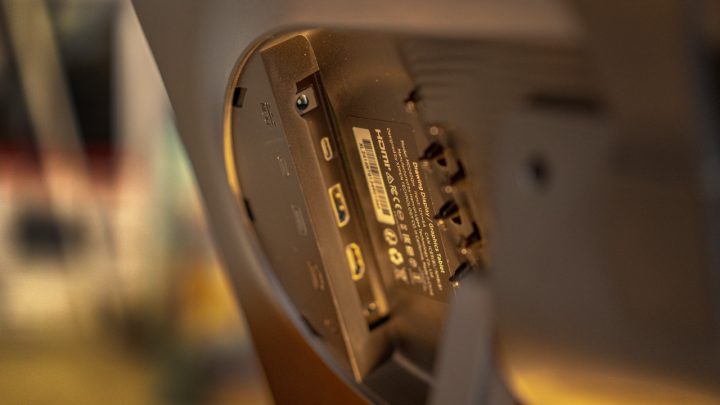
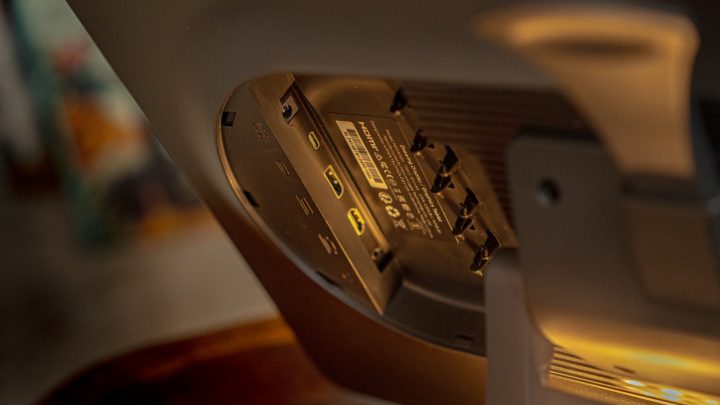
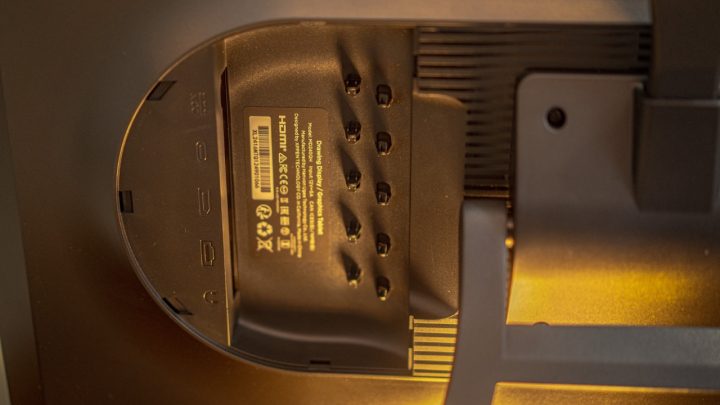
Now, at the back, they also overhauled the look with a fanless design, and they now have a vertical airflow design that directs heat upward, dissipating it naturally and maintaining the device’s temperature. This helps make the display quieter. The rear panel’s design, with subtle ribbed textures, likely helps in regulating airflow and prevents the device from overheating during extended sessions.
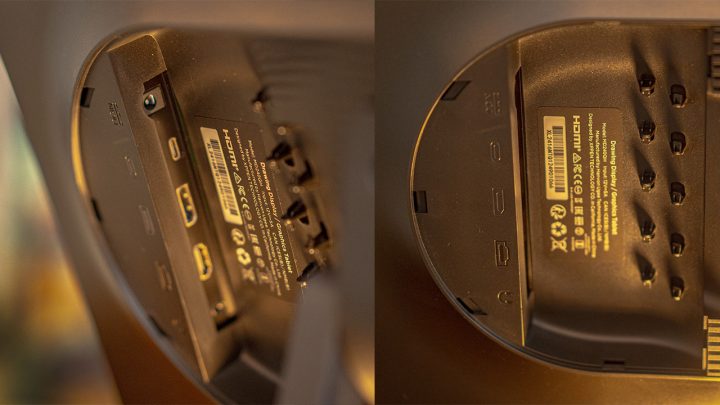
The ports included are USB-C 1, 3.5mm Audio Output, DisplayPort, HDMI, and DC-IN, but it lacks a USB port.
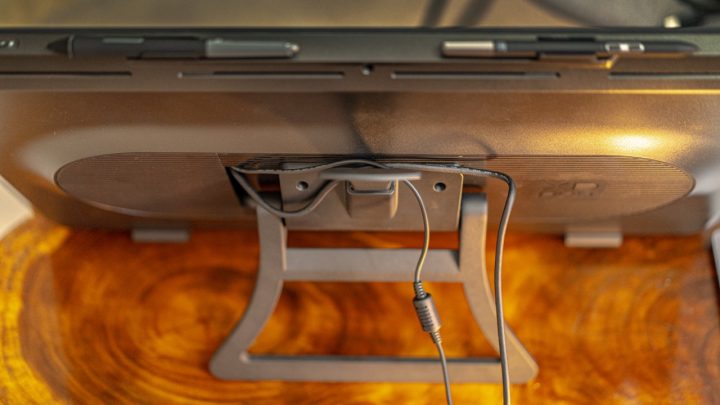
The thickness of the display seems well-judged—thin enough for portability but robust enough to avoid feeling fragile. While not paper-thin, the build appears solid and durable. The back housing, where the cooling system and cable management are integrated, gives it just the right bulk for stability, particularly when using the stand.
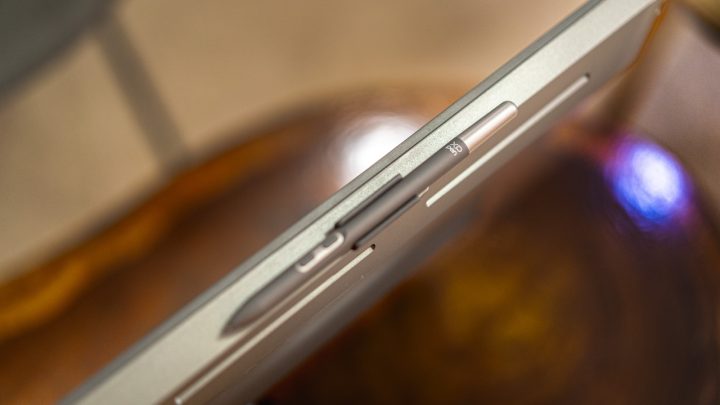
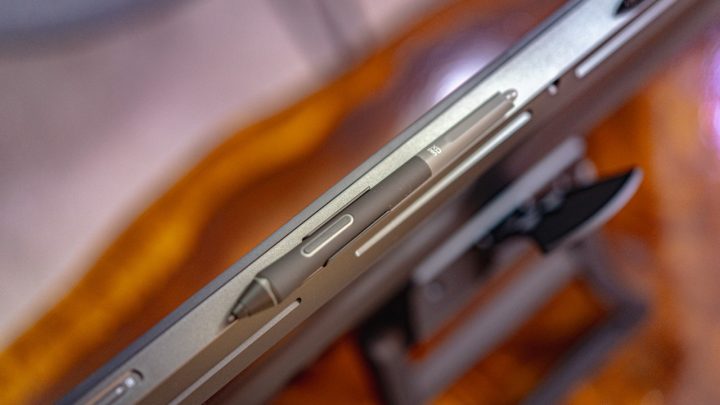
The dual stylus clip is a new feature, located on the top of the device. This clip is cleverly designed to hold both the X3 Pro and X3 Pro Slim styluses, giving users the flexibility of choosing the tool that best suits their workflow. The clips are accessible from both sides, making them easy to use for both left-handed and right-handed artists. The clip’s thoughtful placement ensures that the stylus is always within reach, yet never obstructs the user’s workspace.
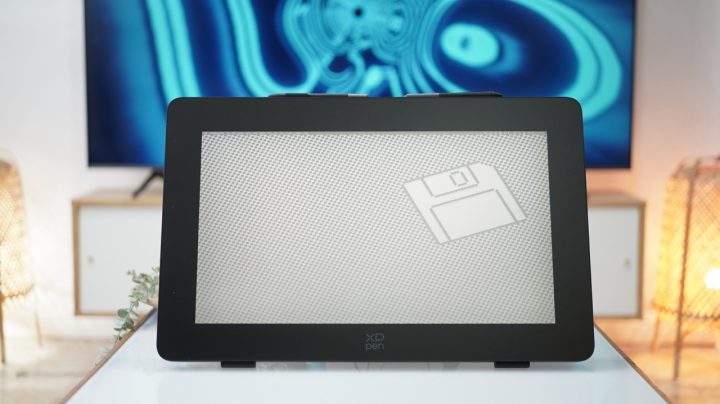
The display’s finish is a matte dark gray or black, exuding a professional, understated aesthetic. The matte finish also helps avoid fingerprints and smudges, keeping the device looking clean and sleek throughout use. The material seems to be a high-quality plastic that balances durability with lightness.
Setup process is the same as the previous model, very straightforward—just plug and play. I usually use the USB Type-C to Type-C cable, and it works well. But this year, I used it on a higher spec laptop, a MacBook Pro with the M2 Max chip, and I had a way better experience than last year’s test using just the M1 MacBook Air.
With that said, I’ll recommend using a higher spec model if possible on your end. I didn’t experience any lag or delay during scrubbing or drawing intricate designs, but I will detail that in the performance section later.
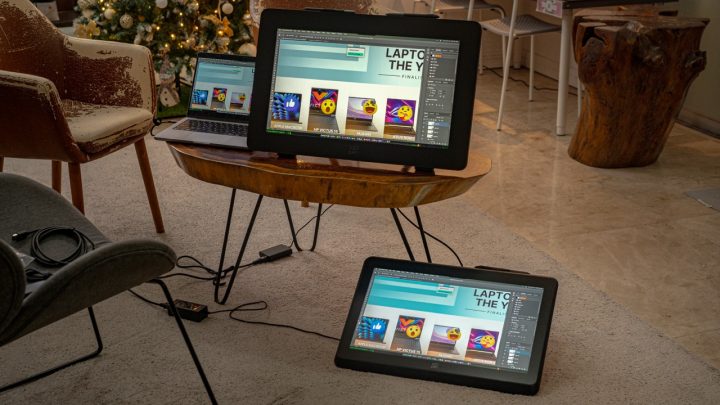
By default, it still automatically extends the display once you insert the cable. But what’s interesting is that I also tried inserting another display via HDMI cable (which was the previous model Artist 22 Plus), and by default, it mirrored both displays.
However, I do recommend installing the driver for your platform immediately so the sensitivity and pressure work accurately, allowing you to attain the best performance from the XP Pen Artist Pro 2024 Drawing Display. I will share the details of the software in the software section, especially since this year they included the wireless keyboard, which was not included and was an optional purchase before.
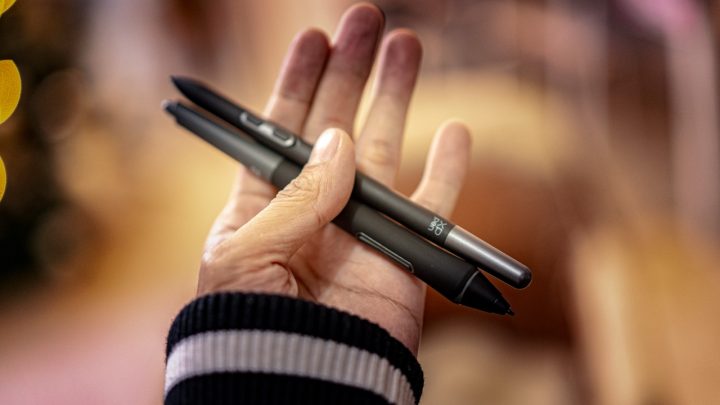
Also, this year, they added two stylus pens—the X3 Pro Smart Chip Stylus and the X3 Pro Slim Stylus. Both still don’t need a battery, which is a big plus. And oh! If you’re curious if the pens from other devices will work on other models, I tried it, and it worked without any issues. So, if you have other XP Pen devices that use the same pen, you now have spare accessories to use, which is a big plus.
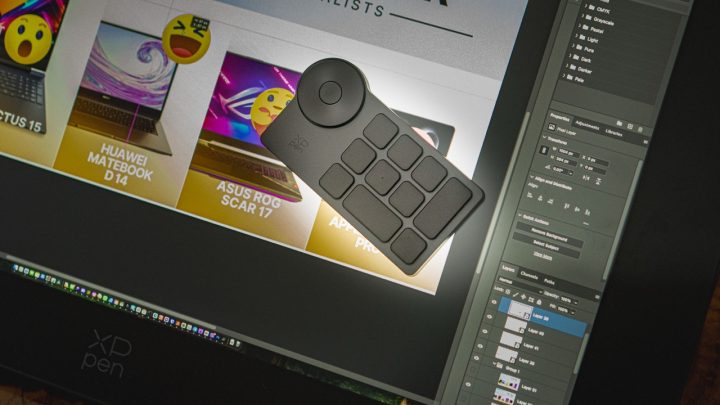
But I did an experiment where I wanted to try if two wireless keyboards would work at the same time, just to test if it’s possible to use both as multiple instances of the device. Since having two wireless keyboards would give me more than 20 keys to configure, it seemed like a good idea.
But, sad to say, it treats both as the same device. Meaning, if you press the same key on the other wireless keyboard, it will have the same functionality—you can’t make it different for each key. Maybe XP Pen can update this through a driver? That would be great! Imagine having multiple wireless keyboards with instant macro keys for access.
Now, you’re probably going to say, isn’t that the purpose of the source machine’s keyboard? Well, yes and no.
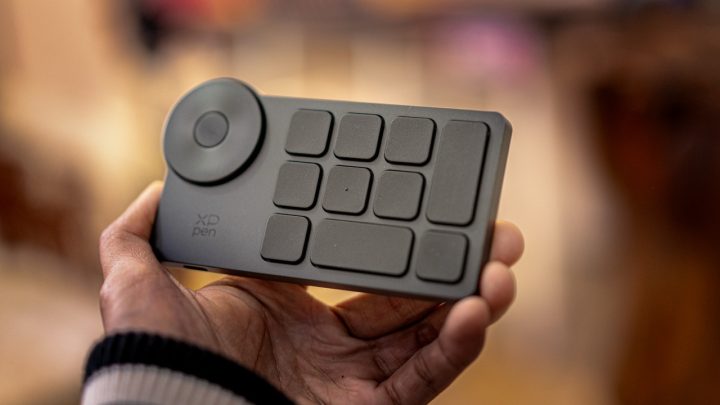
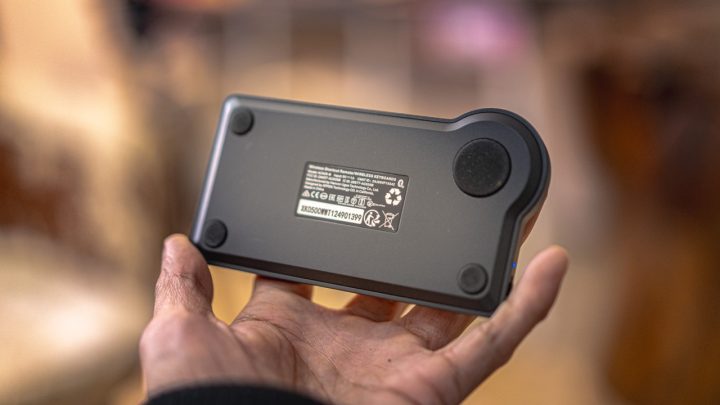

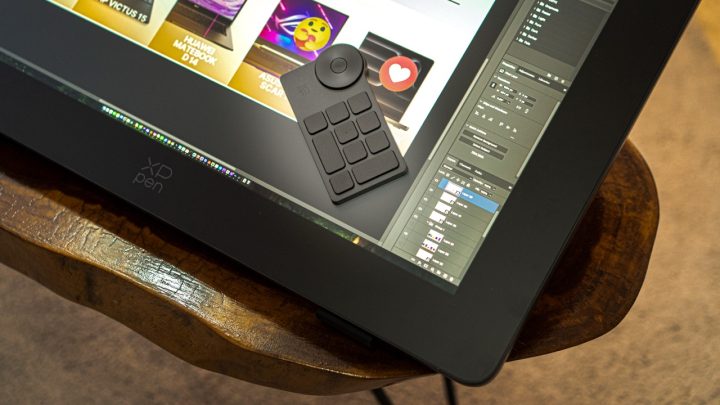
Basically, ergonomics-wise, the wireless keyboard has a small footprint that I can easily move anywhere on the screen or in my workstation, while the source machine is fixed on your table. It’s okay, but reaching for a shortcut and pressing a combination of keys adds extra steps to the workflow, and the wireless keyboard can help with that.
For example, imagine using the roller key on both keyboards with different functions: the first one for zooming in and out, while the other roller controls brush sizes, right? Wouldn’t that be cool? Anyway, if anyone from XP-Pen is reading this, I hope you can add that feature—it would bring so much joy to artists like me!
The XP Pen Artist 24 (Gen 2) features a 23.8” 2.5K QHD (2560 x 1440) display with dimensions of 526.08 x 295.92mm. It now has an upgraded AG Nano Etched and AF Coating glass, a fully laminated display, and still includes anti-glare and anti-fingerprint matte finish properties.
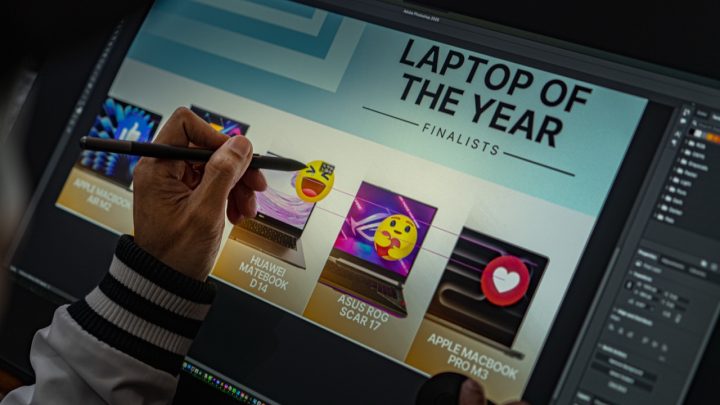
In my experience, it offers a more paper-like feel compared to the Artist 22 Plus. When I draw on the display, I hear that paper-like sound when scribbling, similar to the experience I have with my iPad, for which I bought a paper-like texture overlay.
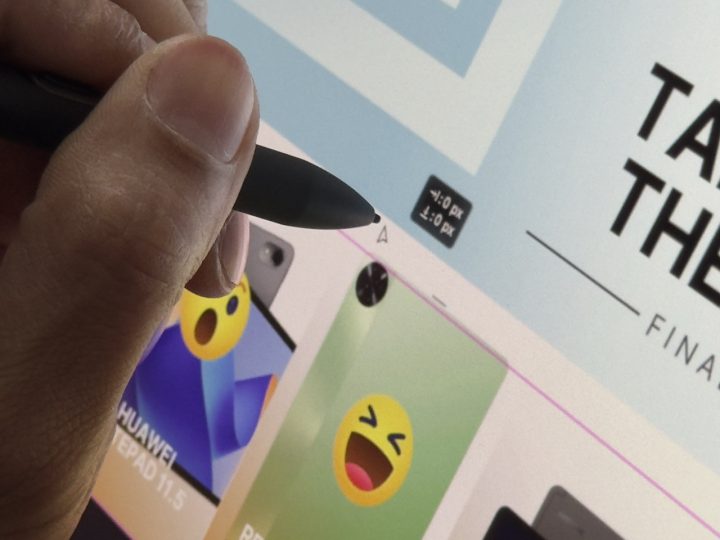
In fact, the gap on this year’s display is even smaller, almost gapless, which is a joy to use.
This year, you’ll also notice that the bezels have increased. This could be good or bad for some creative artists, but in my case, although it felt like going back in time with thick bezels, I found it a big plus. It offers more space to rest my palm and also supports the wireless keyboard when working. Ultimately, it will depend on user preference whether the thick bezels are liked or not.
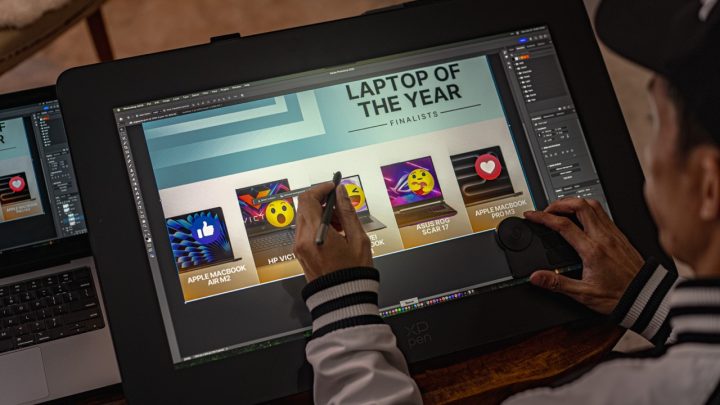
And oh! The 2.5K QHD display is a great update. If you remember, one thing I didn’t like about the Artist 22 Plus was the limited 1080p resolution. So, I’m glad they improved it in this year’s model. I think the 2.5K resolution is sufficient for most users, but do note that there’s also a 4K version of this model if you need even higher resolution.
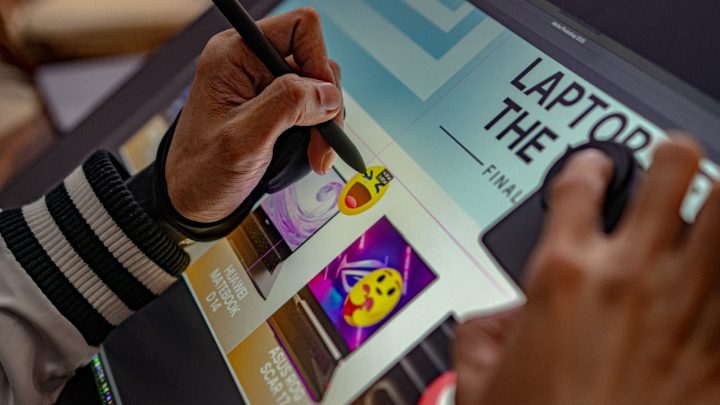
The model we have features a 165Hz refresh rate, and to be honest, I noticed the smoothness while scribbling since my device can push up to 120Hz. If you’re using Windows and have a higher GPU capable of more than 120Hz, you’ll definitely enjoy this for creative work, productivity, and even gaming.
However, keep in mind that only the USB Type-C to Type-C connection can utilize the 165Hz. If you use the included HDMI cable, it can only push up to 144Hz max.
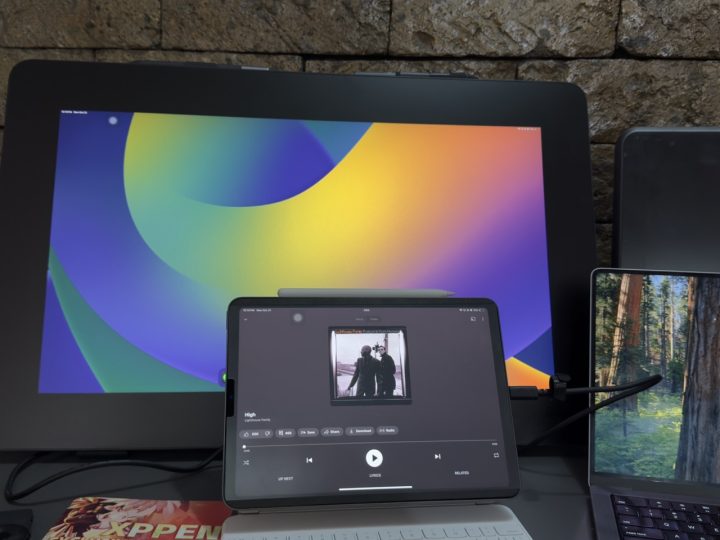
I tried playing on my iPhone and extended the display to this, and the gaming experience was buttery smooth. As long as your device supports these refresh rates, you’ll enjoy this upgrade. But if your source device is just 60Hz and you plan to upgrade to this, you’ll have the same experience for now, but you’ll be future-proofed if you upgrade your source device later.
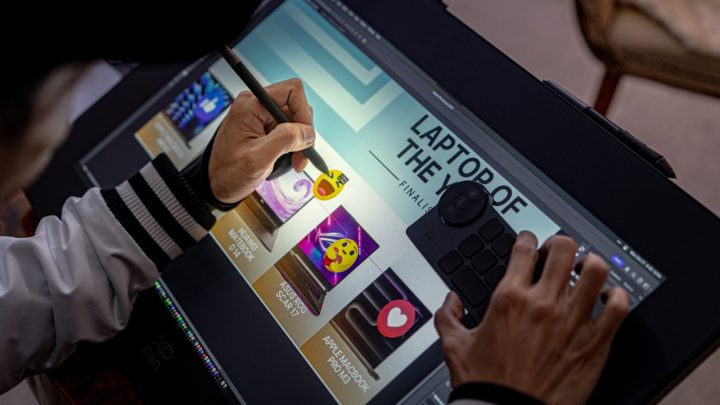
They still included the X-inspo Wrist Rest, an ergonomic accessory designed to support and comfort the wrist during prolonged drawing sessions. It seems to be designed for right-handed people since the logo flips when placed on the left hand. BTW! I’m left-handed, so it’s just a minor pet peeve, but it doesn’t affect the display’s performance—LOL!
Moving on to the color gamut, it has a Contrast (Typical) of 1000:1, 99% SRGB Coverage Ratio (Typical), 99% Adobe RGB, 94% P3, and a Brightness (Typical) of 250cd/m2 with a viewing angle of 178°. What’s new this year is that this display is claimed to be the world’s first 165Hz Calman Verified 24-inch drawing display.
For those unfamiliar, Calman is the leading display color calibration software developed by Portrait Displays. They specialize in tools that ensure accurate color reproduction on screens, making their software widely used by professionals in industries like film, photography, and graphic design.
Calman Verified is their certification that a display meets high standards for color accuracy.
Now, Calman Verified means that a display (like a monitor, TV, or drawing tablet) has been tested and certified to show very accurate colors. It ensures that what you see on the screen matches real-life colors as closely as possible. This certification is important for professionals like graphic designers, video editors, or photographers who need true-to-life color representation in their work. In simple terms, Calman Verified guarantees that the colors on the screen are trustworthy and won’t look off or unnatural.
Now let’s focus on the stylus. Like the previous generation, it includes the XP Pen X3 Pro Smart Chip Stylus, but wait, there’s more! This year, they added another stylus: the X3 Pro Slim Stylus, plus a stylus case, but more on that in a bit.
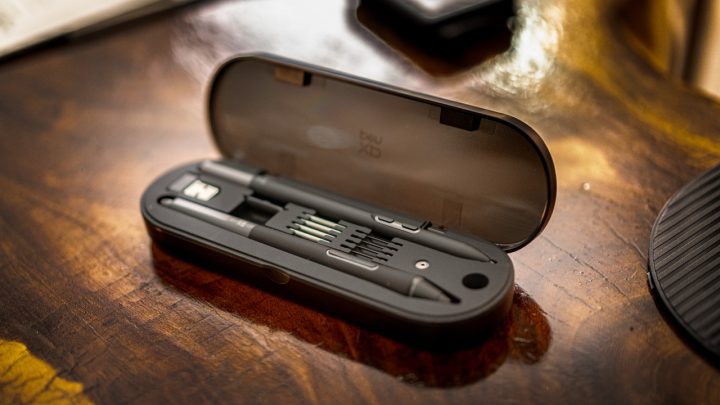
So! The difference between the two styluses comes down to the feel and functionality for most artists.
The X3 Pro Series Stylus gives a more traditional feel with features like 60° tilt recognition and 16K pressure levels, which are incredibly responsive—especially with a starting pressure of just 3g.
This makes it great for detailed, precise strokes. Plus, it has an eraser functionality on the other side of the pen. The default keys still work the same as the previous generation: the upper key for double-clicking the mouse, the lower key for right-clicking, and a scroll wheel.
The pen also supports pen ID recognition, so you can assign custom shortcuts, which is a nice touch for those who want to personalize their workflow.
But I do wish they’d add a feature for on-screen hover in the next generation for additional workflow functionalities.
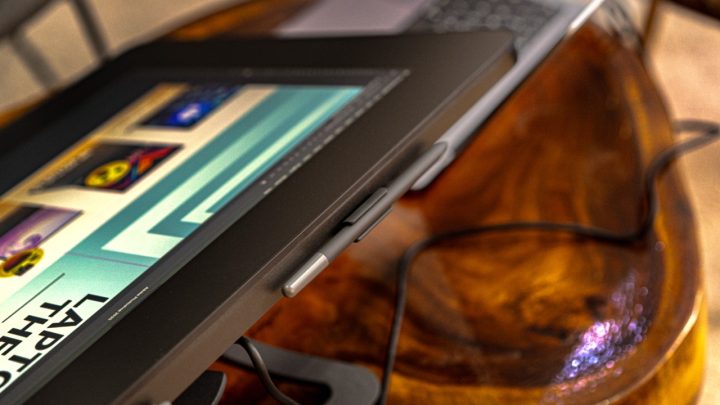
The ≥200RPS report rate means your strokes will feel smooth and accurate.
On the other hand, the X3 Pro Slim Stylus has a more modern and lightweight design, offering the same 16K pressure levels but with a thinner nib and a smaller magnetic core. These design choices make it feel more like a pencil, reducing any visual obstruction and enhancing precision.
The slim body also includes storage for extra nibs, which is super handy. Its 26° tapered design makes it more comfortable for long sessions, especially if you’re used to the grip of a pencil.
Both are great tools, but the X3 Pro Series might be better for artists who prefer a traditional feel and robust customization, while the Slim Stylus offers a sleeker, more streamlined experience for those who value precision and a lighter touch. If you ask me, I actually use them both, and I love that I have the flexibility to use either anytime, anywhere I want.
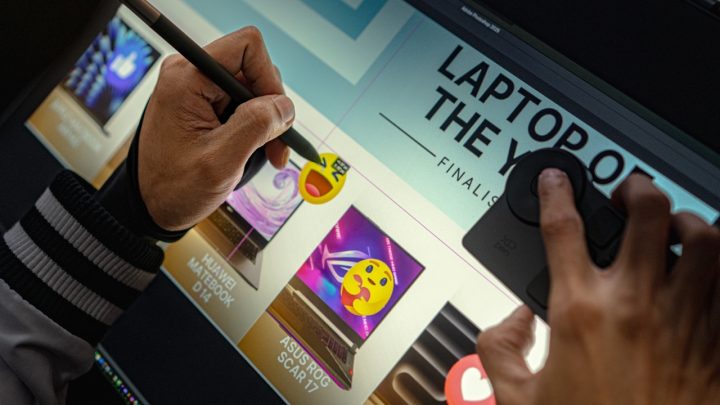
For example, when I want a precise stroke, I use the Slim Stylus because it feels more like a natural pen size, so I can easily work through small details. Meanwhile, the Pro Smart Stylus is for when I want that smooth, flowing drawing experience, like for curvy and swivel lines. Either way, it depends on your workflow, but now you have both right out of the box.
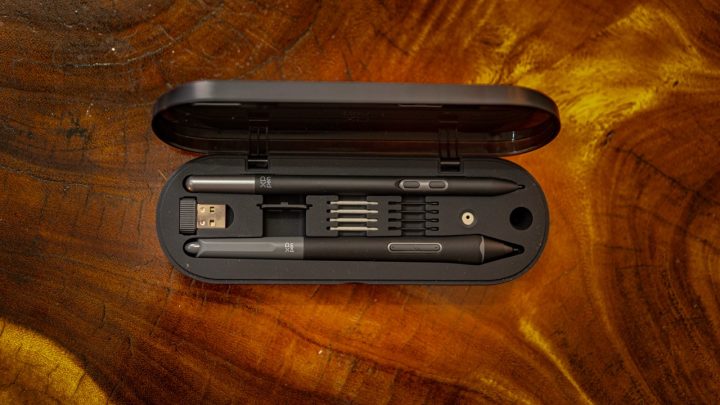
What’s new this year is the redesign of the carrying case. Comparing it visually to the XP Pen Artist 24, the stylus carrying case has gone from a cylindrical case to a well-executed combination of sleek aesthetics and practical functionality.
Its streamlined, oval shape makes it highly portable, easily fitting into bags without adding bulk, which is perfect for artists on the go.
The case comes in a matte black finish, giving it a modern, professional look while minimizing fingerprints and scuffs.
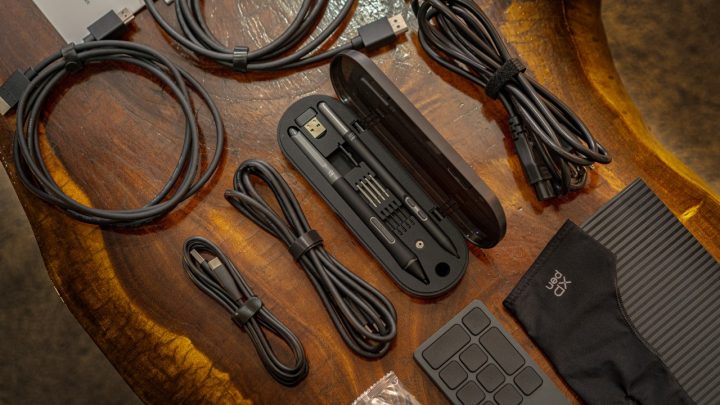
The smooth exterior feels durable, while the interior is cleverly designed with custom-molded slots to keep everything secure. Inside, you’ll find space for two styluses, a USB connector for the wireless keyboard in case you don’t want to use the Bluetooth feature, several replacement nibs, and a small tool for nib replacement, all neatly organized to prevent them from moving around.
The inclusion of dedicated space for two styluses is a thoughtful touch, allowing us to switch between tools or have a backup ready during long sessions. If you ask me, I like this new design compared to the cylindrical version. It’s more familiar, like a pencil case, and in fact, there’s a section where you can stand the stylus—pretty nifty and a clever design, actually.
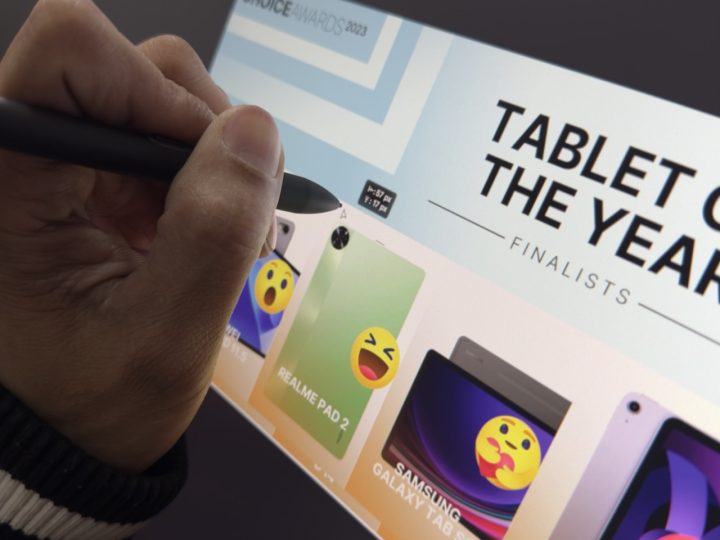
Oh! And of course, both styluses are still battery-free! No need to charge, but here’s a suggestion for XP Pen: I know this might sound silly, but is there a way you could add a sensor or a mini sound-emitting feature to the pen to help us easily find it whenever it gets misplaced? LOL!
Just to share, during our review, while we were doing product shots and moving the display to different locations, one of the styluses went missing. It took us almost two hours to find it, only to discover it was sitting in the corner of my desk.
I know it’s a minor issue, and you might say, “just keep an eye on your pen,” but hey! It wouldn’t be bad to wish for a future feature, right? That’s just me sharing my short experience of losing a pen and looking for it for hours. If it had a “find my device” feature or a sound emitter, it might have been a different story—haha!
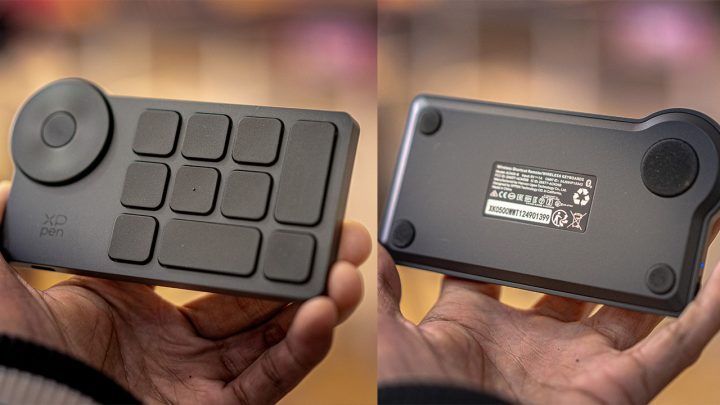
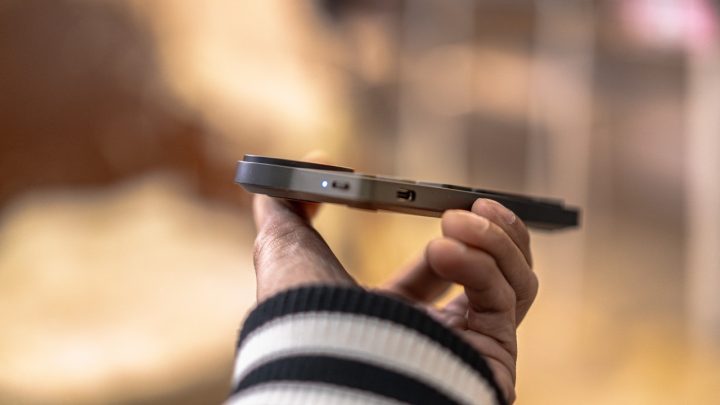
Anyway now, for the wireless keyboard, it still has the same design, but I did notice it uses a different version model number. I’m not sure if there’s an improvement either in the software or functionality, but through my testing, I didn’t notice any major differences. It still has those customizable keys, the same layout, and the scroll wheel design. It also has rubber feet, but it still slides off if you place it on the screen at a high tilt angle.
Pairing is still easy—just toggle and hold the switch for a few seconds until it blinks rapidly, and you’ll see it on your Bluetooth device.
Oh! Just another suggestion—maybe in the future, they could add some stickers that we can place on the keys. Since this is used by artists, having default functionality or icon stickers on the keys would be a great addition to easily identify specific keys. Honestly, configuring the custom keys still confuses me sometimes in the settings, even though the keys are labeled “K#”. Again, just another suggestion **wink**.
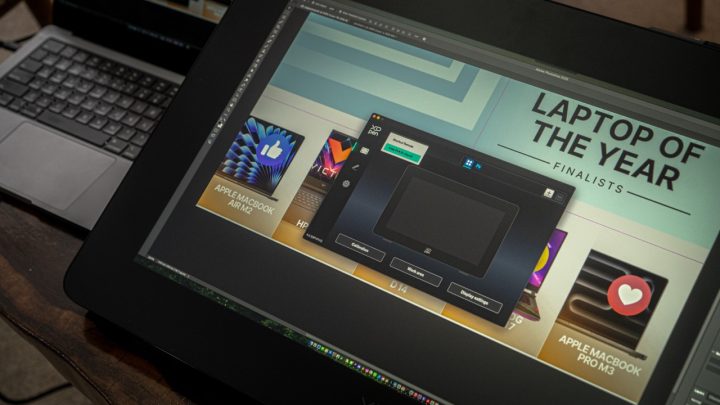
Now, in terms of the software, it’s now in version 4.0, and if you’ve seen the previous UI/UX, you’ll notice a big difference—it’s now more refined and easier to navigate.
It has three sections: (Display Settings, Stylus Settings, and Settings).
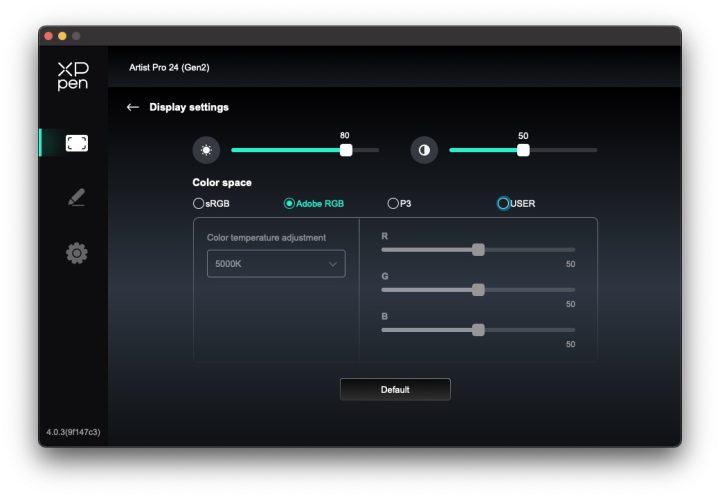
Display Settings: You can change the brightness and contrast and also adjust the color space to sRGB, Adobe RGB, P3, or User. By default, it’s set to Adobe RGB. If you set it to User, you can manually adjust the R-G-B settings. There’s also a button to return to the default settings.
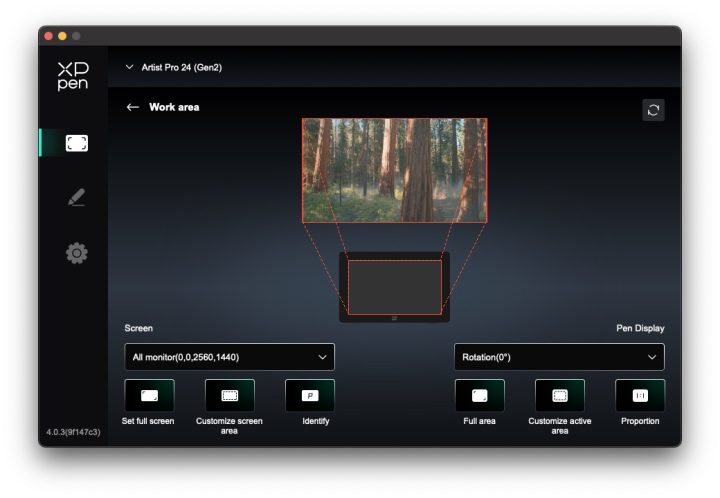
Work Area: On the left side, you can select which screen to use (if you’re working with multiple monitors), such as choosing “All monitors” or specific resolutions. Below that, options like Set full screen and Customize screen area let you work with the entire screen or define a specific portion.
On the right, there’s a rotation setting, which lets you adjust the display’s orientation (like rotating it 90° if needed). You can also define whether you want to work in the Full area or customize the active area to match your workflow. The Identify button helps you locate the screen, useful if you’re working with multiple displays.
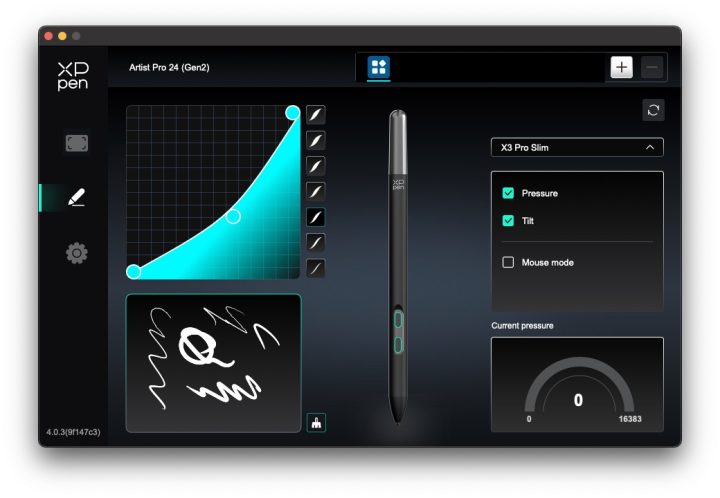
Stylus Settings: In this section, you’ll find a graph where you can adjust the sensitivity of the stylus. It also comes with seven preset settings that you can easily toggle if you don’t want to manually adjust it. In the lower-left corner is a pad where you can test the pressure of the stylus while adjusting it on the fly.

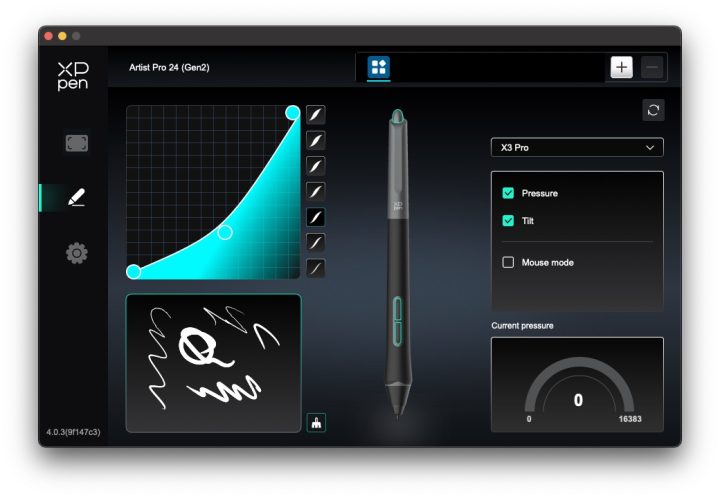
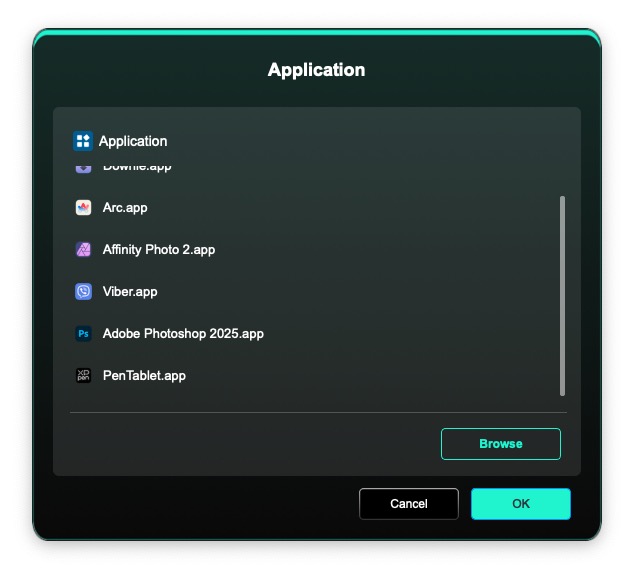
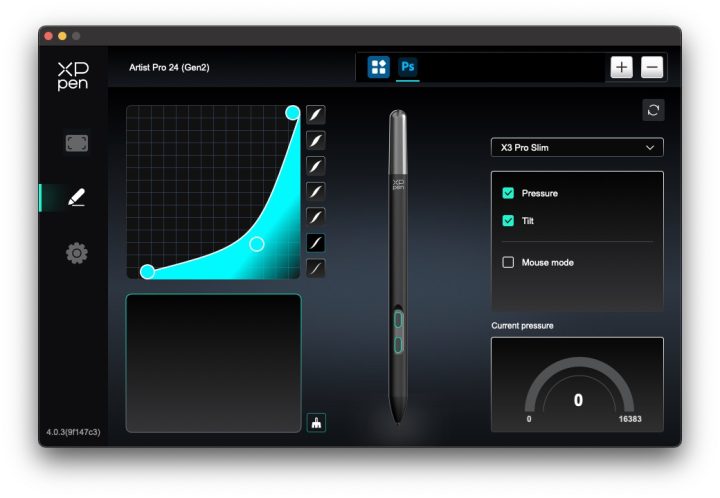
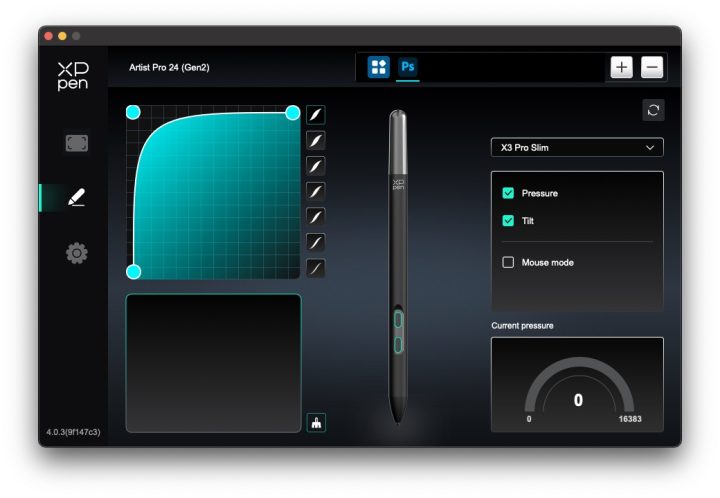
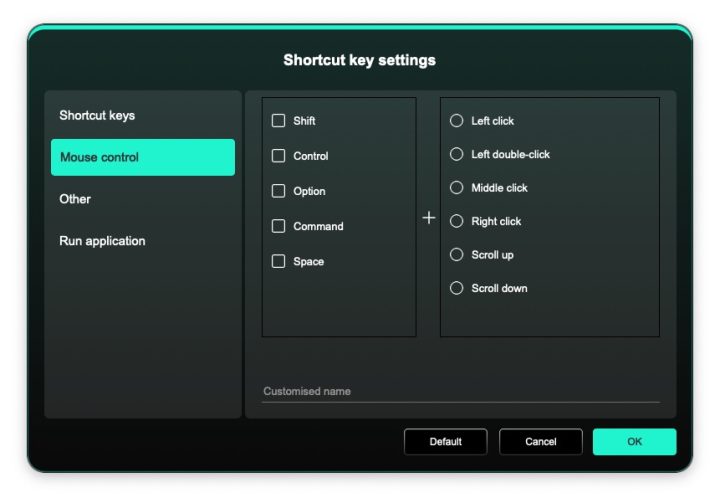
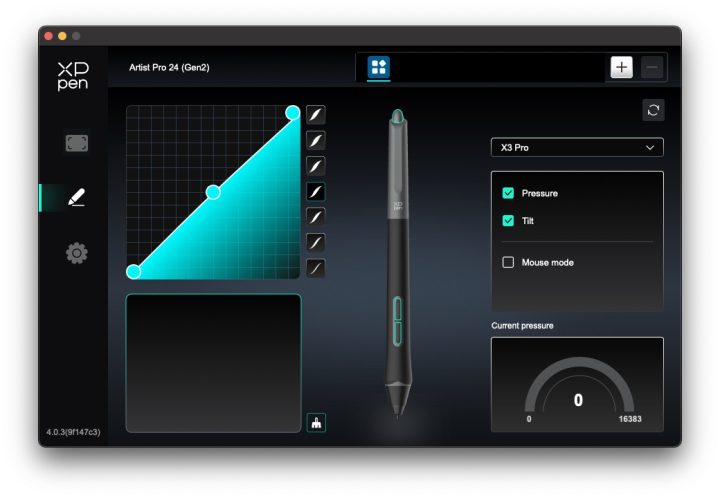
You can also add different pressure and sensitivity settings for specific apps. In the upper-left corner, you can select the applications you want to adjust the settings for. There’s also a tick mark to check the pressure, tilt, and even mouse mode.
Lastly, in the bottom-right corner is the current pressure visual chart, where you can check the pressure level as you push the stylus down when drawing. Since it comes with two styluses, you can select from a dropdown which stylus you want to configure.
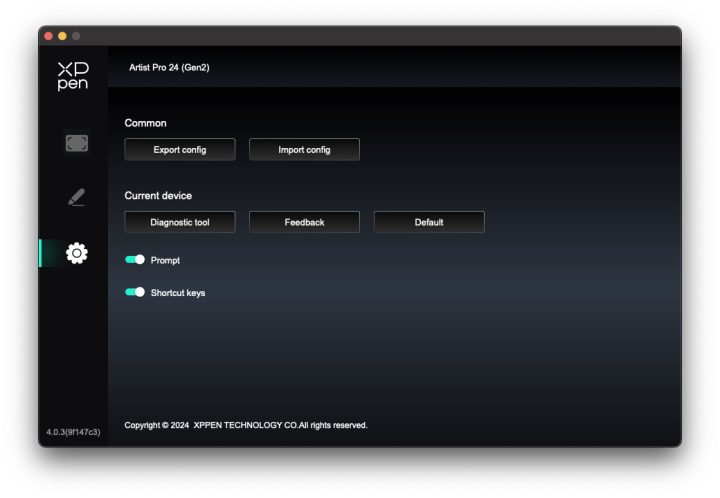
Settings: In the settings interface of the XP-Pen Artist Pro 24 (Gen 2), you’ll find configuration management. Let me break it down.
The first section, labeled Common, includes:
Export config: allows you to back up your current settings into a file. This is particularly useful if you work on multiple machines or want to restore your personalized setup after a reset or on another device.
Import config works hand-in-hand with the export feature, allowing you to quickly load your saved settings. This makes switching between different environments a breeze, especially if you need to maintain a consistent setup.
Current Device Diagnostics
Below that, in the Current Device section, there are a few options focused on troubleshooting and resetting the tablet:
Diagnostic tool is a handy feature for identifying any issues with the tablet itself. Whether it’s detecting calibration problems or checking functionality, this tool helps ensure everything is running smoothly.
Feedback offers a direct way to send your thoughts or bug reports back to XP-Pen. It’s a quick and easy way to contribute to software improvements or seek assistance.
Default resets your tablet settings back to factory defaults. If you’ve ever made changes you weren’t happy with or are troubleshooting an issue, this is the quickest way to start fresh.
Customizable Toggles
Finally, at the bottom, there are a couple of toggles that offer more control over your workflow:
Prompt lets you turn on or off system notifications or prompts within the XP-Pen software, great if you prefer a cleaner, interruption-free workspace.
Shortcut keys enables or disables the customizable buttons on your tablet. If you like to assign commands to your tablet buttons, keeping this on enhances productivity. For those who don’t use the feature, toggling it off avoids accidental presses.
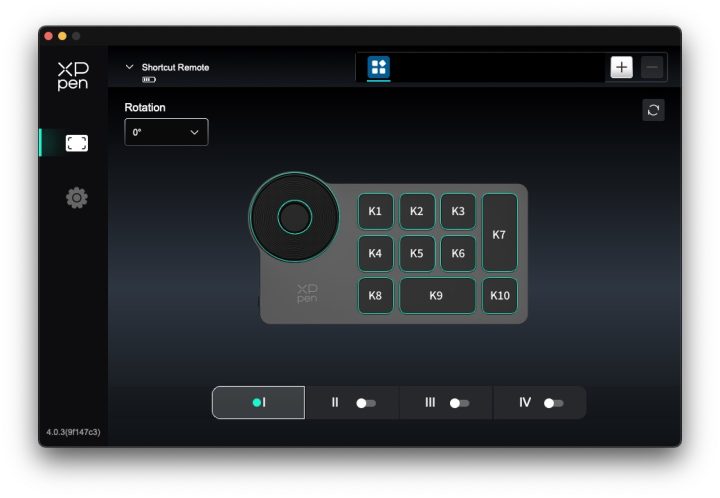
Lastly, the Wireless Keyboard. This is an optional purchase for other models, but for the XP Pen Artist 24 (Gen 2), they included it.
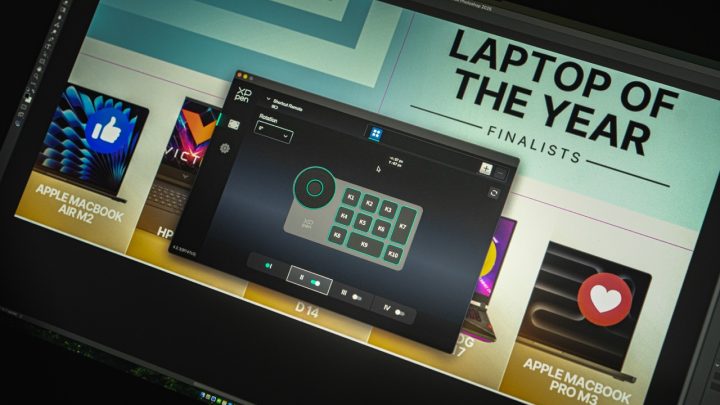
This is the settings interface for the XP-Pen wireless shortcut remote.
Remote Layout: The image in the center shows the layout of the remote, which has 10 programmable keys (K1 to K10). You can assign specific shortcuts or commands to each key, depending on the software you’re using. This flexibility allows you to tailor the remote to your workflow, making it easier to execute frequently used actions without touching your keyboard or screen.
Rotation Adjustment: On the left side, you’ll see a rotation setting that lets you adjust the remote’s orientation. You can rotate it in 90° increments to match the way you prefer to hold the remote—whether you’re left-handed or right-handed or just want a different angle for comfort.
Profile Switching: At the bottom, there are four profile slots labeled I, II, III, and IV. Each profile represents a different set of shortcut configurations. This is particularly useful if you use different software programs or workflows—like one setup for drawing, another for video editing, and a third for graphic design. You can quickly switch between these profiles by toggling the slots, making the remote highly adaptable for various creative tasks, or via a shortcut key.
Dial Control: The large circular area on the left is the control dial, which you can use for functions like zooming, scrolling, or adjusting brush sizes, depending on how you configure it.
Like I mentioned during my setup in the review, I used my MacBook Pro M2 Max, and the difference in terms of performance is huge. No lag, more responsive, and a smoother experience. But as I also mentioned, the majority of the processing is handled by the source machine, so the display functionality itself doesn’t really affect performance. However, I did notice that the higher refresh rate is way better, as it reduces image flickering and eye strain, thanks to the 165Hz refresh rate.

Still, you cannot use the device without plugging in the power adapter.
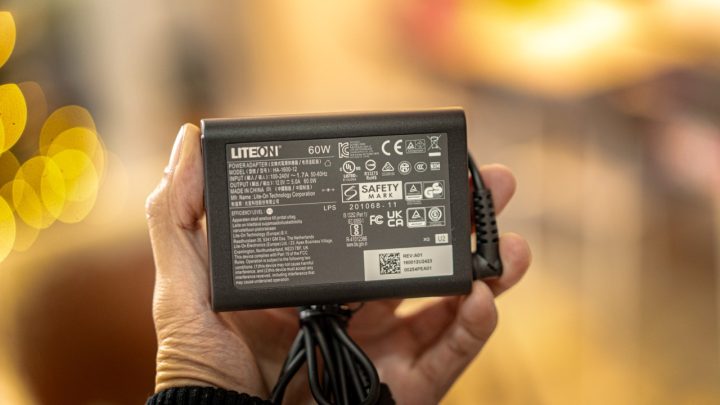
Speaking of the power adapter, it now uses a LITEON 60W adapter, which is more compact and modern-looking compared to the Artist 22 Plus’ more generic adapter.
As mentioned earlier, you can only utilize the 165Hz refresh rate when using the Type-C to Type-C cable, while with HDMI, it’s capped at 144Hz.
The stylus still has limitations with the maximum tilt, just like before, but the performance is still well up to my expectations.
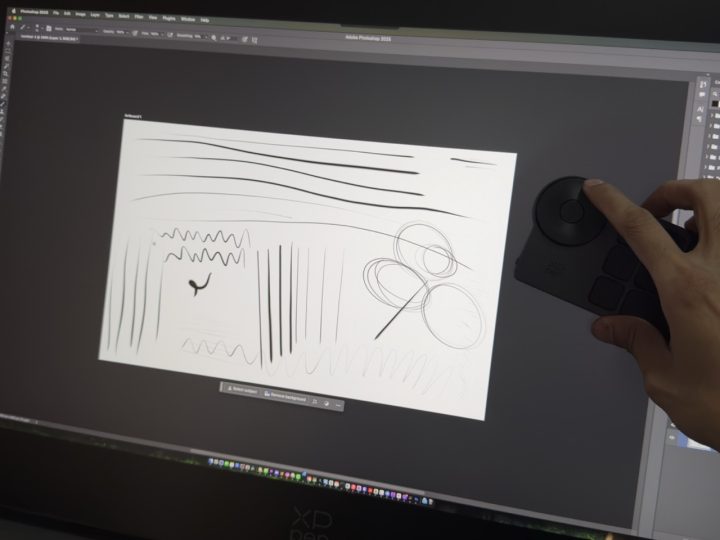
During testing, the ruler, jitter, and wobble tests were passed. No issues came up during our review, even though we were using an unreleased driver since XP Pen sent out this unit before its launch. But again, for the best experience, always install the drivers and update them if there are any available.
I love the paper-like feel when drawing, and the sound it creates is so satisfying. I’m glad they removed the protective film to avoid confusion.

Notably, as most XP Pen users already know, this drawing display is capable of extending an iPad and even Android devices.
However, just like last year, this might be a driver or technology limitation: for the iPad, it only extends the display, but the stylus pen doesn’t work on the display (this could be an Apple ecosystem issue).
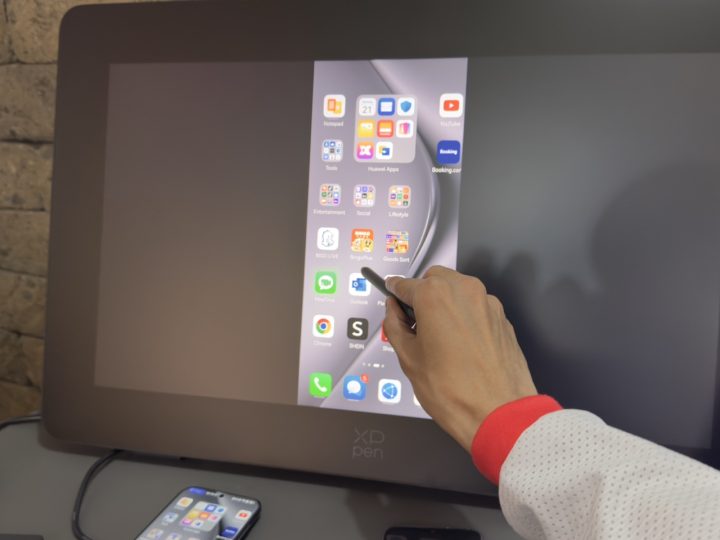
But I did try playing games using my iPad and iPhone, and it was buttery smooth. I love playing on this display since it’s matte, with no distracting reflections while playing.
For Android devices, I tested Samsung, Huawei, and other mid- to high-end brands. Surprisingly, if you’re using Samsung, it automatically docks as Samsung DeX. For Huawei, like the Pura, it detects the stylus, so you can use the drawing display to draw on your Android device and even navigate as if it’s a normal source device, like a laptop.
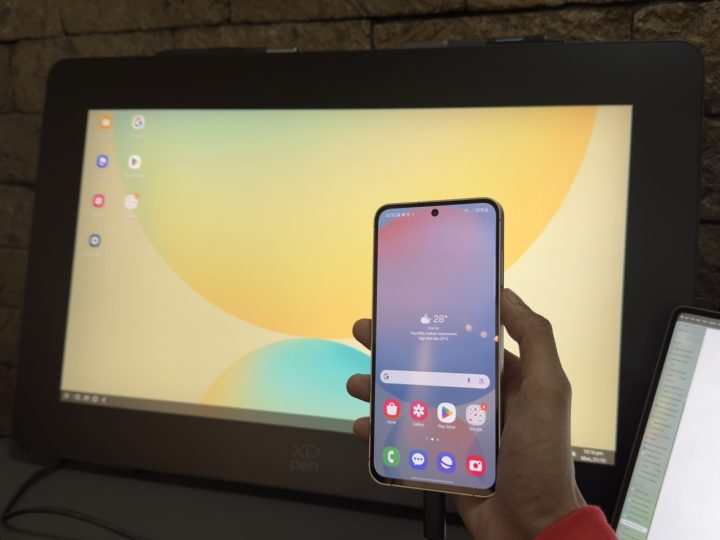
However, for midrange devices, it still shows a black screen, meaning they might not have the capability to transfer display bandwidth through USB Type-C. Like previous models, only flagship devices are compatible.
As usual, I tested it using mainstream digital art software like Adobe Creative Suite (Adobe Premiere, Photoshop, Illustrator, After Effects), Affinity software, and even CAD tools like Shapr3D, Plasticity, and Fusion360 for my 3D designs. All of them worked flawlessly without any hiccups.
Since the XP Pen Artist 24 (Gen 2) is a larger display compared to the Artist 22 Plus, it will take up more space on your workstation. But if you want to use it more like a monitor, they actually offer a mount. The ACS02 Stand is designed for easy, single-handed adjustments, allowing you to tilt your drawing display between 16° and 72°.
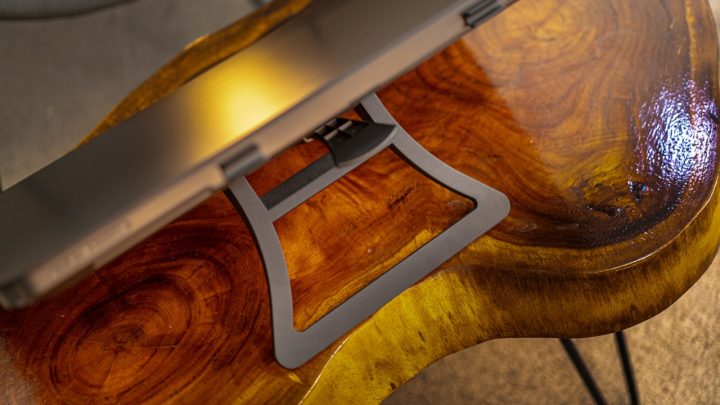
This range of motion makes it adaptable to different working setups and creative environments. Whether you’re sitting, standing, or moving between tasks, it provides personalized comfort that helps reduce fatigue during extended sessions.
Now, for those seeking more versatility, the optional ACS15 Stand offers height adjustment, additional angle flexibility, and even support for under-desk creation. This stand also includes a rotation feature, offering even more customization for your workspace.
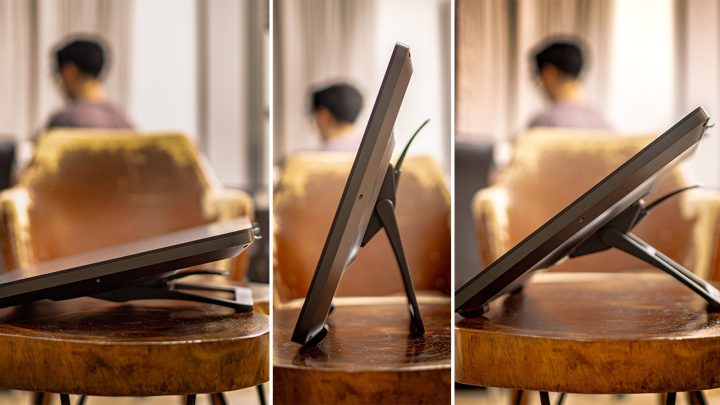
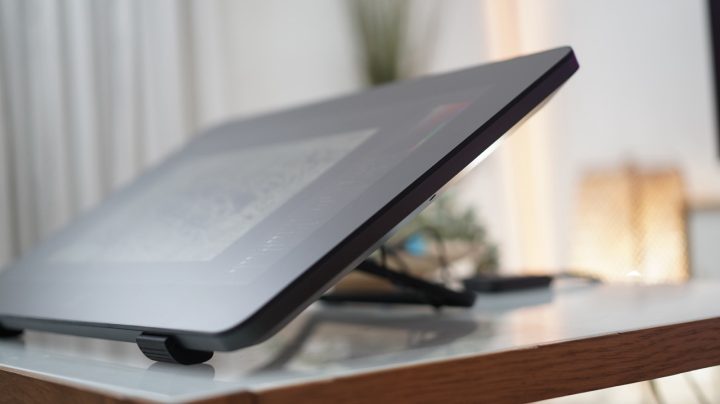
But the built-in adjustable stand is already great right out of the box. It’s very easy to change positions—simply press the lever and adjust to the angle you prefer.
I find it comfortable using it almost flat, though it does take up quite a bit of space.
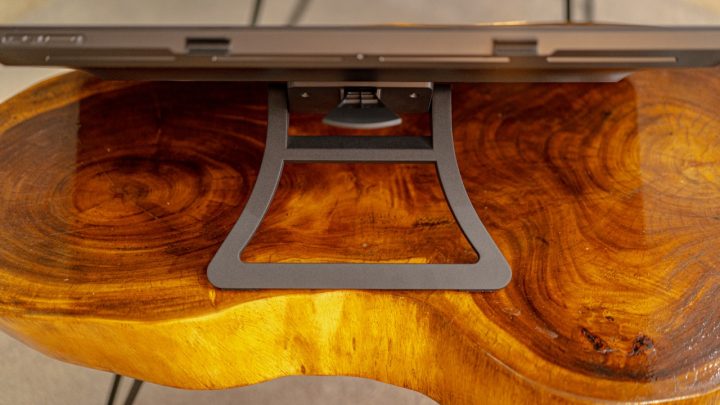
For context, it fits on an IKEA LINNMON table, along with the Artist 22 Plus, for those who are curious.
Overall, this device offers a practical workspace solution, particularly for artists who work in varied lighting conditions.
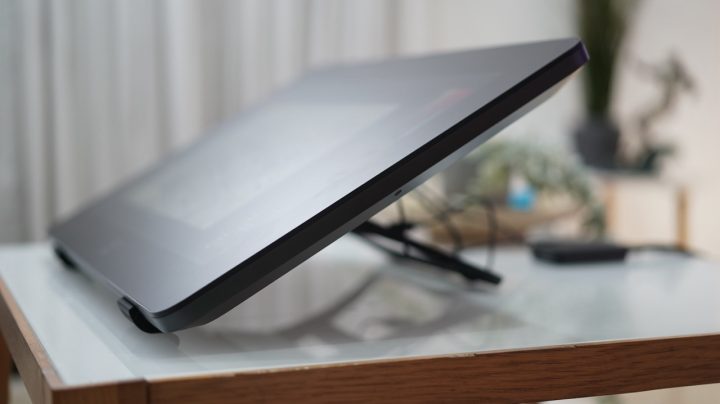
One standout feature I love is the matte finish on the display, which effectively reduces glare and reflections.
This is especially helpful if you’re working late at night or in environments with less-than-ideal lighting. However, it’s important to note that the matte finish may not suit everyone, as some might prefer the vibrancy of a glossy screen, so this aspect boils down to personal preference.
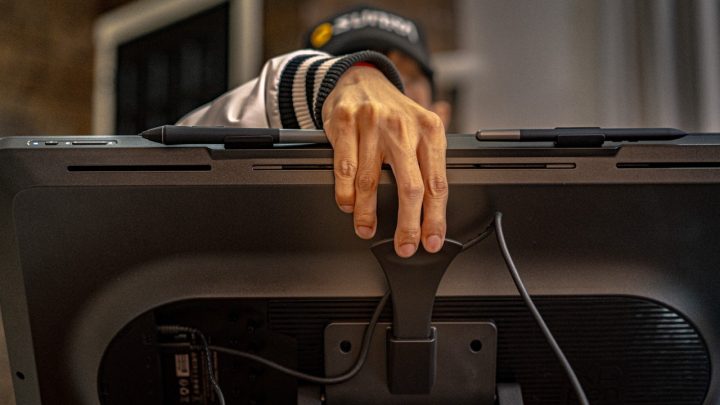
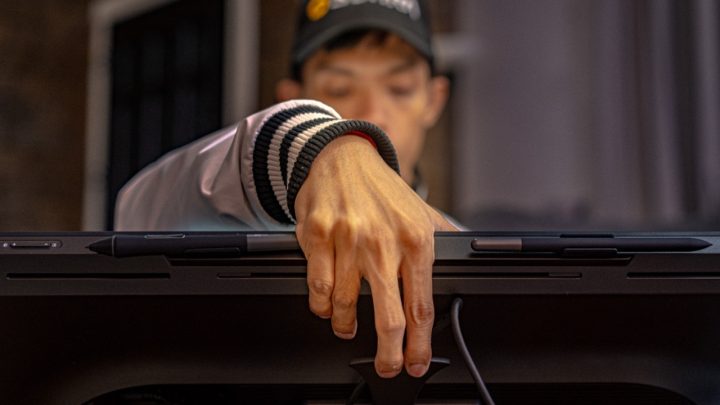
Another strong point of the Artist Pro 24 is its sturdy display panel. The screen feels solid and does not bend or flex when you rest your hand or fingers on it while drawing.
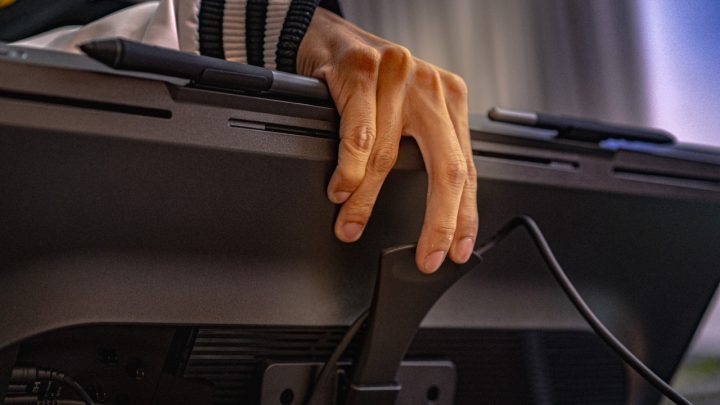
This durability ensures that the display can withstand long drawing sessions without affecting the surface, adding to its overall build quality and reliability.
It’s a great choice for artists who need a robust device that can handle intense, daily use. Plus, the flat display design adds comfort when drawing for long periods.
Pros and Cons
| What we liked | What we did not liked |
|---|---|
| Ample Larger, and accurate display with better color reproduction | Might be bulky for Some |
| Premium build quality and better design aesthetics | No touchscreen functionality |
| Dual Stylus with both High-level stylus sensitivity | Requires continuous power supply |
| Versatile stand with wide angle range | No USB Port at the back |
| Efficient cable management | No Hover on-screen stylus functionalities (software) |
| Customizable pressure curves | |
| Added more Accessories (Wireless Keyboard) | |
| MaOS, Windows, Linux and Android Compatible |
The XP Pen Artist Pro 24 (Gen 2) series provides two excellent options, each tailored to meet the needs of different types of users:
The Artist Pro 24 (Gen 2) 4K seems ideal for those who prioritize ultra-sharp visuals and high-resolution details, such as professional digital artists, video editors, and graphic designers who need top-tier clarity and precision. If your work involves meticulous detailing or handling large, complex files, the 4K version, priced at ₱59,000, is likely a great choice.
Artist Pro 24 (Gen 2) 165Hz: Is for artists who value smooth, fast performance, especially for animation, video editing, or fast-paced illustration work. The 165Hz refresh rate ensures there’s no flickering or motion blur, which makes a significant difference when working on fast, dynamic visuals.
For a more budget-friendly option, priced at ₱46,999, this version delivers responsiveness without compromising on the quality and color accuracy XP Pen is known for.
Both variants come with two styluses, ergonomic designs, and full-laminated displays, making them highly adaptable for both casual creators and professionals who demand precision and reliability in their workflows.

XP Pen has come a long way from being an unknown brand to becoming a disruptor in the digital creative space. Launching the XP Pen Artist Pro 24 (2nd Gen) is a testament to their mission of providing accessible drawing displays for aspiring artists who want to start without breaking the bank.
For those who are starting out, these options are a solid investment. While this may be XP Pen’s most expensive series to date, it’s still incredibly affordable compared to the Wacom Cintiq counterpart, offering nearly the same quality at 50% lower prices, which is unbelievable considering the features.
Ultimately, the 4K variant is best suited for those who need absolute pixel perfection and work on high-resolution projects, while the 165Hz variant caters to artists who focus more on real-time performance and fluid drawing experiences.
These devices are ideal for digital illustrators, animators, video editors, and creative professionals who need a reliable, powerful tool for daily use. XP Pen has made professional-level drawing displays more accessible, delivering both quality and affordability for creators across various disciplines.
Check out the link below If you plan to grab one.
XP-Pen Artist PRO 24 (2nd Gen) Specs:
| Specification | Artist Pro 24 (Gen 2) 4K | Artist Pro 24 (Gen 2) 165Hz |
|---|---|---|
| Display Size | 23.8 inches | 23.8 inches |
| Resolution | 4K Ultra HD | 2.5K QHD |
| Refresh Rate | 165Hz | |
| Color Performance | – Delta E<1 in sRGB | – Delta E<1 in sRGB |
| – 99% sRGB | – 99% sRGB | |
| – 99% Adobe RGB | – 99% Adobe RGB | |
| – 98% Display P3 | – 94% Display P3 | |
| – 1.07 billion colors | – 1.07 billion colors | |
| Pen Technology | – 16K pressure levels | – 16K pressure levels |
| – X3 Pro Slim Stylus | – X3 Pro Slim Stylus | |
| – X3 Pro Smart Chip Stylus | – X3 Pro Smart Chip Stylus | |
| Screen Features | – AG Nano Etched glass | – AG Nano Etched glass |
| – AF Coating | – AF Coating | |
| – Full laminated display | – Full laminated display | |
| Included Accessories | – Built-in adjustable stand | – Built-in adjustable stand |
| – Dual styli clips | – Dual styli clips | |
| – Pen case | – Pen case | |
| – ACK05 Shortcut Remote | – ACK05 Shortcut Remote | |
| Color Calibration | – Calman Verified | – Calman Verified |
| – 3D LUT calibration | – 3D LUT calibration | |
| – XPPen ColorMaster software | – XPPen ColorMaster software | |
| Price | $1,299.99PHP 76,291INR 110,174EUR 1,238CNY 9,462 | $1,099.99PHP 64,553INR 93,224EUR 1,048CNY 8,006 |

YugaTech.com is the largest and longest-running technology site in the Philippines. Originally established in October 2002, the site was transformed into a full-fledged technology platform in 2005.
How to transfer, withdraw money from PayPal to GCash
Prices of Starlink satellite in the Philippines
Install Google GBox to Huawei smartphones
Pag-IBIG MP2 online application
How to check PhilHealth contributions online
How to find your SIM card serial number
Globe, PLDT, Converge, Sky: Unli fiber internet plans compared
10 biggest games in the Google Play Store
LTO periodic medical exam for 10-year licenses
Netflix codes to unlock hidden TV shows, movies
Apple, Asus, Cherry Mobile, Huawei, LG, Nokia, Oppo, Samsung, Sony, Vivo, Xiaomi, Lenovo, Infinix Mobile, Pocophone, Honor, iPhone, OnePlus, Tecno, Realme, HTC, Gionee, Kata, IQ00, Redmi, Razer, CloudFone, Motorola, Panasonic, TCL, Wiko
Best Android smartphones between PHP 20,000 - 25,000
Smartphones under PHP 10,000 in the Philippines
Smartphones under PHP 12K Philippines
Best smartphones for kids under PHP 7,000
Smartphones under PHP 15,000 in the Philippines
Best Android smartphones between PHP 15,000 - 20,000
Smartphones under PHP 20,000 in the Philippines
Most affordable 5G phones in the Philippines under PHP 20K
5G smartphones in the Philippines under PHP 16K
Smartphone pricelist Philippines 2024
Smartphone pricelist Philippines 2023
Smartphone pricelist Philippines 2022
Smartphone pricelist Philippines 2021
Smartphone pricelist Philippines 2020